First there was Wonder bread. And then there was the plain white breadboard. My oh my, how times have changed! Just walk into any Subway, and you’re faced with choices like Honey Oat, Italian Herbs & Cheese, Parmesan & Oregano…and don’t even get me started on Panera. The breadboard industry naturally followed suit, with breadboards of all shapes, sizes and colors.
In particular, do you remember when we launched these color Mini ProtoBoards a couple weeks ago? As they have been selling like hotcakes, we knew they were pretty popular. So popular that they were the feature of a Make blog post, who also found them being sold at FunGizmos.
Well we ordered a ton more, which cost us a lot less. And we’re ready to pass the savings on to you. All Liquidware Mini ProtoBoards, any color, are now just $3! And even less if you buy a bunch at once. Enjoy adding that pinch of creativity to your project, or use them as dominoes. They’re fun either way. Check out some fun things we did with ours:
Colored mini protoboards
Really neat animation with lots of mini black protoboards
Tuesday, April 29, 2008
Tuesday, April 22, 2008
Community Economics Redux
Let’s add another element to the OSH community—economics. Community economics are the workings of our functional interactions: how we each play our roles within the community so everyone gets what they’re looking for—and everyone is better off for it.
In a project-oriented OSH community, engineers and developers can make things even faster and better than previously imagined...for much less than companies with huge R&D facilities. What’s interesting is that the OSH community would be far more in tune with customer demand for designs and features than most companies would be. Typically, a tech company will conduct market research to get a sense of what customers want.
In this situation, the OSH community not only has the ability to contribute to projects, but also the chance to select and modify the projects they would most like to see. And whatever comes out of this development will not only be high quality and less expensive, but given the grassroots approach, it will also satisfy customer demands more than ever before.
The difference between open source hardware and software is that software requires little or no supplies and financial investment—where hardware does. As Matt discussed in an earlier post, the success or failure of OSH depends on what a single individual can achieve within a reasonable personal budget. Based on this, I see two approaches to making OSH successful (i.e., maximizing what each individual can achieve on that budget)
1) Incentivize involvement to offset personal financial investment
2) Reduce the personal financial investment necessary for development
There are different ways to incentivize involvement. But let’s think about open source software. People aren’t paid anything to contribute, and yet the body of software that has been developed is enormous. Look at Linux and Apache. Both have enormous market share—Apache in the realm of 70% (don’t quote me on that). Why? Well, first off, it’s free. But not only is it free, it’s constantly improving. What motivates people to contribute code? As Yochai Benkler put it in his TED talk on the matter: "Money isn’t always the best motivator…if you leave a $50 check after a dinner with friends, you don't increase the probability of being invited back. And if dinner isn't entirely obvious, think of sex.”
His analogy draws a hearty laugh from the audience because they know it’s true. Just because you give someone money does not necessarily make them want to do it more. On the flip side, you could say that they are simply not getting enough money. But the point is that there are things that people will do just for the money, and other things people would choose to do for free because they enjoy them. In the latter category is contributing to open source software.
It’s a task that, when farmed out to a large number of people, is nominal work for each person, but they get the satisfaction of contributing to something greater and working with a community of like-minded people. Additionally, contributors will likely be developing something of interest to them, and can each benefit from the community product. Perhaps Ganesh Prasad of Linux Today puts it best:
“Metaphorically speaking, each programmer contributes a brick and each gets back a complete house in return. In software, unlike with physical goods, one person's gain does not come at the expense of another because a copy does not deplete the original in any way. Sharing software is not a zero-sum game, and there are tremendous efficiencies from participating in such a cooperative endeavour.”
The contributors have numerous non-financial incentives to participate, and their participation does not detract from their lives in any way. The time they spend doing it is enjoyable and gives them a chance to help a community, enriching their lives in both that sense of fulfillment as well as being able to use the end product.
But that’s software. So what’s different about open source hardware? Well, the design process can be free and collaborative as with software, but the prototyping and manufacturing of the final product, being tangible, will cost money. As individuals, or even as small groups, it might be difficult to print circuit boards and conduct the prototyping process that is so essential to open-source hardware development. But collectively, it might be worthwhile to have prototyping resources available just for developers. And then the open source hardware community could grow and flourish as much as the open source software community currently does. How would this work? Who will make this investment? Matt will speak to these questions in Open Source Hardware, Part 2.
Monday, April 21, 2008
Putting it all together
Here's a quick little video that Chris and I took of the DoubleTall ExenderShield, plus the Arduino, TouchShield, and Lithium BackPack. We've interfaced the whole thing to an accelerometer, and added some bar graph code Mike's been working on.
I think it'd be really cool to start a Processing / Wiring graphics API on the TouchShield, so graphics could be programmed in the same API model as the Arduino...
And here's another quick video of the same thing:
I think it'd be really cool to start a Processing / Wiring graphics API on the TouchShield, so graphics could be programmed in the same API model as the Arduino...
And here's another quick video of the same thing:
Wednesday, April 16, 2008
I’d Like the Prime Rib…But Can I Substitute My Baked Potato for a PCB?
I was thinking to myself earlier today about the pros and cons of the emergence of open source hardware. I was trying to pin point the details that would make this hobby attractive or make its development distasteful in the view of a very critical and hard-to-impress global society.
We find ourselves changing interpretations of certain things all the time. Whether it involves defining what is ethical, fun, interesting, or difficult, it seems we all view aspects of life in a different light. For the sake of agreement, and for the sake of coming to a conclusion for once in our lives, I think it is safe to establish a few maxims concerning open source hardware. In order to establish and preserve the sanctity of open source hardware, it is important that we all respect the same underlying principles. In order for a piece of equipment to be considered open source hardware, it must be ready and available to be manipulated by other parties. This type of hardware is so unique because modifications can easily be made to pieces of hardware to either moderately or drastically change the possible functionality of the unit.

How do you feel about open source hardware and what are your plans to help shape the open source hardware community?
Tuesday, April 15, 2008
TouchShield: up and running in 5 minutes
*Update* Matt and I are working on a new installation tutorial for the Stealth and Slide since it now includes a bunch of new SubProcessing and fast graphics functions. See the updated Up and running on the TouchShield Stealth and Slide in 5 minutes where it walks you through the entire installation.
So you just got your TouchShield in the mail...

At this point, if your like many, your probably asking the very valid question which is,
Up and Coding Fast
What is the TouchShield?
As it's name suggests, the TouchShield is a shield (add-on board) designed to be used with an Arduino Diecimila (www.arduino.cc). The TouchShield gives the Arduino an OLED and Touchscreen to help design more advanced applications based around the Arduino electronics development platform.
Hardware Description
 The Arduino
 The TouchShield
IDE Setup
Programing
Remember before writing code, select the TouchShield board option from the Arduino menu to compile and download to the TouchShield.

The Code
COLOR red = {255,0,0};
COLOR blue = {0,0,255};
void setup()
{
lcd_rectangle(20,20,80,80, red, blue);
}
void loop()
{
}
Hit the compile (play) button on the IDE and watch the output window to make sure everything compiled correctly. Then, press the program button on the side of the TouchShield. Now upload your code by pressing the upload button in the Arduino IDE.
Results
 The above image was drawn on the TouchShield from the included code in this post.
Thats it!
Stay tuned for another more advanced tutorial using Serial to send data between the Arduino and TouchShield.
So you just got your TouchShield in the mail...

At this point, if your like many, your probably asking the very valid question which is,
"How the hell do I use this thing?"
Up and Coding Fast
- What is the TouchShield
- IDE Setup
- Programming
- The Code
- Results
What is the TouchShield?
As it's name suggests, the TouchShield is a shield (add-on board) designed to be used with an Arduino Diecimila (www.arduino.cc). The TouchShield gives the Arduino an OLED and Touchscreen to help design more advanced applications based around the Arduino electronics development platform.
Hardware Description
 The Arduino
 The TouchShield
The Touchshield shares pins 0,1 only during programming and uses pins 2,3 only if serial comms between the Arduino and TouchShield are desired. Serials communications are useful when you want to do Input/Output with the Arduino.
IDE Setup
- Install Arduino (If you haven't already)
- Extract the zipped touch core into arduino-xxxx/hardware/cores
- Replace the arduino-xxxx/hardware/boards.txt file with this one
Programing
Remember before writing code, select the TouchShield board option from the Arduino menu to compile and download to the TouchShield.

The Code
COLOR red = {255,0,0};
COLOR blue = {0,0,255};
void setup()
{
lcd_rectangle(20,20,80,80, red, blue);
}
void loop()
{
}
Hit the compile (play) button on the IDE and watch the output window to make sure everything compiled correctly. Then, press the program button on the side of the TouchShield. Now upload your code by pressing the upload button in the Arduino IDE.
Results
 The above image was drawn on the TouchShield from the included code in this post.
Thats it!
Stay tuned for another more advanced tutorial using Serial to send data between the Arduino and TouchShield.
Community Arduino Projects
What is a community? Merriam-Webster gives 12 different (slightly) different definitions. But is the notion of community really that hard to pin down? Not really. But because it’s so commonly defined by its context, the dictionary gives us a few of the most used contexts. Taking a quick glance across the entries, it seems that a community has to do with individuals having something in common. They probably interact with each other too. What that “something” is…well, it depends. In our case, that “something” is electronics. Hardware. It’s what brings us together, and it’s what brought you to Antipasto.
I’m not entirely sure how this is supposed to work, but I figure I’ll go out on a limb, and the rest of you can refine what I’ve got. Each individual in the community can share something or receive something, but preferably both. Within our world of open-source hardware, this is especially important.
So within our Arduino community, right now, when I get stuck, I can expect someone to help me out and when another fellow Arduino-er needs a hand, hopefully I can pitch in. But this seems like a one-off situation, where people interact far less than they could…and get far less from the experience. Right now, it seems the common link is simply the platform that serves as the foundation for all these individual projects. Wouldn’t it be far more useful if the project were the common link?
With the platform being the common link, individual users only see the common problems that others encounter, and then use solutions to those problems to work on their own tasks and projects. It’s probably likely that many people are working on the same projects as we speak, and they just don’t know about it. Maybe they’ve run into different problems along the way. And until the very end (which there usually isn’t), neither would know that there is someone else doing just what they’re doing. That’s an example of fine brainpower being used to work on something that’s already been done.
One of the benefits of open source is that time and resources are spent most efficiently because projects can leverage work that has already been done, or that someone is already working on. As a community, we need to be project-oriented, not problem-oriented. If you can make the projects the common link, each person will work on a component that still needs to be done, and a clear link is made between the project and each piece of the problem. While this is great for the overall structure of the community, it's time to think about what guides our interactions.
Sunday, April 13, 2008
What is open source hardware? Part 1
What is open source hardware really, and why is it so much harder to define than open source software? Recently, there seem to be many attempts to define Open Source hardware, but very little agreement, and certainly no official "expert" who can claim the answer. So where to start? Well, there appear to be two parts of this question:
So what is Open Source hardware?
If we believe the list above, Open Source hardware is about manufacturing and building real stuff, is an order of magnitude more expensive than software, and requires lots of people and companies to pull off. Classical economics would say open source hardware is the production of tangible assets victimized by scale economies and belabored by high coordination and transaction costs. I would simply say it's more complex than Open Source software.
The complexities outlined above suggest a root problem; that the success or failure of Open Source hardware is linked closely with what a single individual can achieve within a reasonable personal budget. In part 2, I'll talk more about this; what seems to be the "Open Source Hardware productivity problem"... before Part 3, which will talk about the collaboration rules for Open Source hardware communities.
- First, what is Open Source hardware?
- Second, what are the collaboration rules of open source hardware and how are they different from Open Source software?
- OSH is tangible, OSS is intangible
- Each OSH product must be manufactured, whereas OSS can be replicated infinitely
- OSH requires $10k's of fixed investment (equipment) and $1k's of variable cost (pcb runs and parts), OSS requires $1k's of one-time investment (PC) and $10's of variable cost thereafter (e.g. internet connection)
- OSH involves making physical things, and there is a cost scale barrier for most products; that is it costs a hardware hacker $500 to make a single $50 product from the ground up, but if he can find 100 other people, the product now costs $55
- OSH requires specialized roles for circuitry, pcb, placement, and soldering design that require contracted services from companies that maintain complex machinery, whereas OSS is generally the same role easily accomplished by a single person start to finish
So what is Open Source hardware?
If we believe the list above, Open Source hardware is about manufacturing and building real stuff, is an order of magnitude more expensive than software, and requires lots of people and companies to pull off. Classical economics would say open source hardware is the production of tangible assets victimized by scale economies and belabored by high coordination and transaction costs. I would simply say it's more complex than Open Source software.
The complexities outlined above suggest a root problem; that the success or failure of Open Source hardware is linked closely with what a single individual can achieve within a reasonable personal budget. In part 2, I'll talk more about this; what seems to be the "Open Source Hardware productivity problem"... before Part 3, which will talk about the collaboration rules for Open Source hardware communities.
Saturday, April 12, 2008
I Want to Take My Electronics Everywhere
Portability is one of the greatest problems that electronic manufactures have to overcome.
Question: So what makes electronics portable?
Answer: Well first the products size needs to be small and compact or as some of us like to say, “sleek and sexy” and second the device can’t be plugged in to the wall all the time. The challenge of portability has historically been a cost driver in the price of electronics; but the fact is people are willing to pay top dollar for ultra thin electronics such as the Apple MacBook Air or the Motorola Q.
Question: Why did it take so long to make these products so portable? How can they become more portable?
Answer: As it turns out the battery is the largest barrier to ultra portability. The compact size (volume) and high energy charge is referred to by the industry as charge density (typically measured in coulombs per cubic meter). The general charge is measured by the amount of current the battery can supply during 1 hour of operation (milliamp hour). Engineers have been innovating in leaps and bounds as they try to make battery powered cars and portable computers; we consumers are placing a high demand on the need of portable electronics.

- Battery manufacturers are increasing the charge density by finding new chemical and packaging processes. Lithium polymer cells have the largest charge density, while lithium ion cells have proven to be manufactured at low costs to the consumer.
- Semiconductor manufacturers are paying close attention to the little details such as the low-power consumption feature of the new Intel Atom chip. Chip makers are constantly making processors and power supply circuits more efficient such as the switching voltage regulator vs. a linear regulator could increase the efficiency to over 90%.
- It is important to remember that as the world changes technologically we don’t forget about the environment so please find a place to recycle your old/outdated rechargeable batteries. http://www.rbrc.org/call2recycle/dropoff/index.php
Thursday, April 10, 2008
2 Code Arduino & TouchShield
I just found out that when coding the TouchShield and Arduino, it's possible simplify the process by having two windows open at the same time...

Since the Arduino uses a different processor and boot loader, keeping two windows open avoids having to switch between the shields in the Tools menu.
If you like making quick changes, this is priceless because I personally like being able to use the program and pray technique to coding sometimes.

Since the Arduino uses a different processor and boot loader, keeping two windows open avoids having to switch between the shields in the Tools menu.
If you like making quick changes, this is priceless because I personally like being able to use the program and pray technique to coding sometimes.
Wednesday, April 9, 2008
Circles, Squares, and Lines... Oh my!
Fiddling and optimizing Bresenham's line-drawing algorithms is fun, but not like as in something you brag about to your friends doing it on a Friday evening.

The TouchShield gives Arduino users a chance to draw shapes right from the Arduino environment, leaving the nitty gritty for the early morning coffee drinkers.
As easy as,

What's more, you can do it all at the hand (or finger) of touchscreen events.

As easy as,

Gentlemen, Start Your...Arduino?
The progression of open source hardware innovation is bringing a whole new meaning to community development. This movement is bringing people together who have never even met before in person. The best part about the open source hardware community is not that they all share many of the same interests, but that this entire community continues to inspire synergistic innovation and creation. Everyone in the community is constantly contributing ideas, sharing videos, and answering questions from fellow hobbyists and professionals. This friendly environment helps mold comfort zones for those who are not socially adept, and also invites and inspires newcomers to enter a realm governed only by open minds and collaborative ideas.
If you haven’t already been privileged enough to be a part of this thrilling and thriving environment, my advice: Check it out. If you’re interested in challenging yourself and being a part of community with no boundaries and unlimited opportunity, open source hardware could be your next big adventure.
If you haven’t already been privileged enough to be a part of this thrilling and thriving environment, my advice: Check it out. If you’re interested in challenging yourself and being a part of community with no boundaries and unlimited opportunity, open source hardware could be your next big adventure.
Tuesday, April 8, 2008
Open Source Hardware, courtesy of Sparkfun
Until about 2000, "software" was pretty much implicit whenever the term "open source" was mentioned. Sure enough, open source software could happen because people everywhere could code easily and share that code. All you needed was a computer and an internet connection, which you already had.
Fast forward to 2002. People begin to toss around the idea that open source might be applicable to hardware as well. Jim Turley (and others) think not. The fundamental concern here is that the requirements to develop open source hardware are much higher. Essentially, you're creating a tangible product and you need tangible building blocks. People will have to pay for these building blocks, and why would they do that? With open source software, the development cost was virtually zero. With open source hardware, the individual engineer will have to sink money to build a product, right off the bat. Prototyping costs money. Development costs money. And should the product work, manufacturing and distributing the tangible product will cost money as well.
So what's the issue? There's a huge hurdle that open source hardware faces that software never did—the host of issues that come with being hardware and being concrete. Does that mean we shouldn't do it? For some people, the answer is yes. But I always say, wherever there's a hurdle, there is great opportunity in finding a way around it. And that is exactly what Sparkfun did—and with that, taking open source hardware to a whole new level.
Now it's 2003, and Nathan Seidle, an electrical engineering student at CU-Boulder, needs a replacement microcontroller and finds it incredibly difficult to get these online. Like any smart guy facing a challenge, he turned it into an opportunity to stock quantities of the products he used, making them available on a user-friendly, easily accessible website called Sparkfun. This way, many more users like Seidle no longer needed to scour the ends of the earth for the products they needed. And what an opportunity it has turned out to be! From the Sparkfun website: "Now in its fifth year, the company employs nearly three-dozen people and maintains a growing office on the outskirts of Boulder. We add new products all the time! If you've got a recommendation or something you can't believe we don't already carry, let us know! sparky@sparkfun.com So enjoy! Take a look around. You may already have your Ph.D. in Material Physics or you may be a curious kid who's ready to wire up your first kit - we've been there and we know how to help."
So back to Jim Turley and the impracticability of open source hardware. Sparkfun found a market of DIYers and engineers who were more than happy to front the costs of innovation. Perhaps Turley took too pessimistic an approach to people. Perhaps the community is indeed willing to foot the bill if it means they can contribute to something greater. Or maybe they just love building their own hardware. I don't know. But it seems like Sparkfun is growing rapidly with an ever-widening fan base who look to them for all their engineering needs.
What's interesting is that before Sparkfun, nobody supplied these parts, and now there are quite a few sources—the likes of Make and Adafruit, to name a couple. But by far, talking to folks who do this stuff, it seems like they've always got at least a few pieces that they "got from Sparkfun". Sparkfun, as the supplier, has arguably enabled the progress of open source hardware, founded on a simple need to pursue independent electronic projects. Somehow they are able to offer low cost products that would typically require high quantity orders from the traditional retailers like Jameco, Digikey, and others. All this is catered to the individual, pioneering, and innovative engineer.
They also have a knack for picking useful and practical components and devices from the wide and sometimes boundless universe of "potential parts". Most of their components have a little bit of a "that's cool" factor, and even if not all of them have immediate applications, they still deliver on stimulation and imagination. Check out the Port-o-Rotary. Or the opening of the WiiMote. I could go on and on, but you get the point.
Knowingly or not, Sparkfun was the first to fill a supply gap that allowed engineers to make open source hardware a very real revolution. Not to say others like AdaFruit, Make, or Arduino were not part of shaping the open source hardware landscape that we have today, because they are. But without Sparkfun opening its doors in 2003, many of us would still be sitting here wondering if Jim Turley was right all along.
Thanks!
Thanks to everyone who wrote in, emailed, volunteered to help out, added suggestions, and for the folks who bought a few TouchShields, ExtenderBoards, and Lithium BackPacks! We made it to two sites (thanks Make and Crunchgear!):
Make magazine

Crunchgear

I should be ready with my "BitDJ" program in a week or 2... I think the physical computing folks out there are really going to like it!
Make magazine

Crunchgear

I should be ready with my "BitDJ" program in a week or 2... I think the physical computing folks out there are really going to like it!
Sunday, April 6, 2008
Super modular Arduino with Extendershields
Looking around at some of the assembled DoubleTall and DoubleWide ExtenderShields, I had this thought that it might be cool to combine everything into a single super-modular Arduino. Although it's not fully functional, in theory it could be, and could actually be made to work with some time (and energy).
Included in the picture are:
-Arduino Diecimila
-Liquidware TouchShield
-Liquidware Lithium BackPack
-Parallax Temperature Sensor
-Parallax Sonar Ping Sensor
-Parallax 2D Accelerometer
-Parallax Motion Sensor
-Libelium GPS Module
-Sparkfun XBee Module
-Liquidware DoubleTall ExtenderShield
-Liquidware DoubleWide ExtenderShield
Saturday, April 5, 2008
Introducing the TouchShield
For the past few months, we've been wrestling with Chinese manufacturers, bargain hunting in South America for pin headers, and negotiating with Russian OEM microcable manufacturers... all to build the cheapest possible OLED and touch screen combination shield, called the TouchShield.
To my knowledge, it's one of the most feature-packed Arduino compatible shields to date, complete with onboard processing capabilities, display functions, and even 16 megabytes of onboard video ram (don't ask how hard it was to cram that on, but suffice to say we found a tiny corner in the back upper left of the PCB where we could fit it).
Here's a picture of the front side:

...and the back side (try to find the ram chip):

...and a picture of the TouchShield snapped on top of a DoubleWide ExtenderShield with an Arduino on the back, and a battery BackPack on the underside as well:

...and here are some videos of the TouchShield in action:
We have 10 of them built and fully tested, with open source software and cores, sitting on the desk right next to us, and we're selling them for $109 if you're interested.
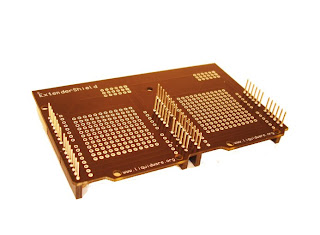
Introducing the DoubleWide ExtenderShield for the Arduino platform
With the growing number of Arduino add-ons out there, especially snap-on shields, I thought it might be helpful to make some pin replicator boards in order to support more than one shield at a time. The idea was tossed around a bit over at the www.liquidware.org site, and so we finally decided to make a few of them to see what they looked like:

And here's an example of Mike demo'ing the Doublewide with a few of the other shields plugged into it:
We also have the DoubleTall ExtenderShield, which allows you to change the orientation of the shields in the opposite direction:


And here's an example of Mike demo'ing the Doublewide with a few of the other shields plugged into it:
We also have the DoubleTall ExtenderShield, which allows you to change the orientation of the shields in the opposite direction:


Mini black and colored proto boards
Here are some shots of the black and multi-colored mini protoboards that just came in, and are on sale over at www.liquidware.com
These things are so cute, you have to see them to believe it. It gives a whole new meaning to the drab beige and white protoboards I'm used to seeing from my undergrad engineering days, and they look darn good in motion.
Here's a video Mike took last night:
And here's a sequence I shot this morning while playing around with a stop-motion webcam animation... enjoy!
Controlling a fan with the Arduino
This is a brief video Chris made last night, showing the Arduino using PWM to control the speed of a CPU fan. The code is available online here.
Touch Shield Bitmap Portal
Touch Shield Bitmap


Image interface code:
2.) Open the Touch Shield Bitmap Portal

3.) Open the bitmap you want to upload


4.) Upload the bitmap (Burn Bitmaps)


- Set up your Touch Shield
- Open the Touch Shield Bitmap Portal
- Open the bitmap you want to upload
- Upload the bitmap (Burn Bitmaps)
- Set the "Board" to "TouchShield" in the Arduino environment.
- Put the Touch Shield into the boot loader by pressing the “Black Button”.


Image interface code:
{
image_interface_begin(); //wait for the vb image downloader to take over
bmp_draw("spears5",0,0); //draw the spears5 bitmap that is stored on the memory chip at //location (0, 0) which is the top left corner of the OLED screen.
while(1); //wait forever
}
2.) Open the Touch Shield Bitmap Portal
- Open "TSImageUploader.exe".
- Enter the
Number”.
3.) Open the bitmap you want to upload
- File -> Open -> spears5.bmp
- The file should be a bitmap (.bmp).
- The file should have a resolution of 128 X 128 or smaller.


4.) Upload the bitmap (Burn Bitmaps)
- Click on the “Burn Bitmaps” button and wait.
- It will say, “Finished” when all of the images are downloaded onto the Touch Shield memory chip.


Getting results with a simple homemade lightbox
When the pictures first come in, they are very yellow tinted, even with some simple tweaks with the built in settings. I haven't been able to find any decent combination of exposure, contrast, brightness, etc. settings to counteract the tinge:
Despite the brightness of the lights, there are still some shadows cast in back of the DoubleTall ExtenderShield:

And in this picture, you can see the walls of the lightbox:

I've done it so many times, I almost have the Gimp edit sequence memorized:

There's still a little tiny hint of yellowish-orange tint, but for the most part you can get the idea :)

It took me about 3 hours total of camera work, editing, and uploading to snap the photos for everything you see on the www.liquidware.com site. Let me know what you think... anyone have any ideas on how I can improve next time?
Despite the brightness of the lights, there are still some shadows cast in back of the DoubleTall ExtenderShield:

And in this picture, you can see the walls of the lightbox:

I've done it so many times, I almost have the Gimp edit sequence memorized:
- Open the image, and crop around the right size
- Open brightness and contrast - improve brightness by 40%, contrast by 70%
- Use the fuzzy color select tool with 14.2 pixel fuzzy tolernace, and select the whitespace
- Fill with whitespace
- Size image to 800 pixel width or 600 pixel height at maximum
- Save and upload!

There's still a little tiny hint of yellowish-orange tint, but for the most part you can get the idea :)

It took me about 3 hours total of camera work, editing, and uploading to snap the photos for everything you see on the www.liquidware.com site. Let me know what you think... anyone have any ideas on how I can improve next time?
Setting up a simple lightbox for liquidware.com product pictures
Nowadays it seems every major online website or store has clean, carefully taken "professional" photos of their products and gadgets. And for some reason, that tends to mean they're floating in whitespace, with little tiny shadows, and certainly no glare or background noise. Weird.
But I suppose if someone really needed to follow the doctrine, they could do a quick online search like I did, cut out a hollow cardboard box, fill the holes with white card board, and then buy a few Home Depot halogen lights for $15 apiece. And in less than 5 hours, I was able to take all the photos you see on www.liquidware.com!
This was the floor before the lightbox:

This is a small shot of the lightbox only, with no lights set up yet:

When you put something in the box, I think you're supposed to turn it slightly sideways, to look "interesting". At least that's what it looks like on other web sites...

I don't know if there's a science to this, but I bought two halogens to point at the corners, and then I wasn't satisfied because all the pictures came out yellow. I bought a fluorescent workman's bulb, which I used to add white light:

If you turn on all the lights, the inside of the box is *very* bright:

The lightbox even overcomes the brightness of my camera's built in flash:

Subscribe to:
Posts (Atom)