So here goes. These instructions are summarized over at the wiki on this page.

Step 1: Install Eclipse
Download Eclipse Galileo-SR2 for Mac OS X-32bit or Windows-32bit or Linux-Ubuntu-32bit, and install it to the desktop or some location inside Documents.
Step 2: Install the Android SDK
This is the trickiest step... Download Android SDK Tools for Mac OS X-32bit or Windows-32bit or Linux-Ubuntu-32bit, and extract the archive into the /eclipse/plugins folder. Open Eclipse, select Help > Install New Software... Click Add, in the top-right corner.When the Add Repository dialog that appears, enter the following:
- Name: ADT Plugin
- Location: https://dl-ssl.google.com/android/eclipse/
- Note: If you have trouble acquiring the plugin, try using "http" in the Location URL, instead of "https" (https is preferred for security reasons).
Click OK and then in the Available Software dialog, select the checkbox next to Developer Tools. Click Next. Then click through to the end until you're done, and then shut down and restart Eclipse.
Then, click the Eclipse -> Preferences Menu, click the Android category, and browse for SDK location: /eclipse/plugins/android-sdk-2.1_r1. Click OK to apply, and the Target, Vendor, Platform, and API columns should have values, then click OK again.
Step 3: Configure ADB
If you're running on Mac, you're already done. If you 're running on Windows, you have to do a couple extra steps. First, download the SDK from Liquidware - this one is specifically designed to work with the Android DIY Starter Kit and the Android Hardware Development Kit. To install the USB driver, just plug a mini-USB cable into the BeagleBoards USB OTG port, and manually install the driver from your_sdk_path/google-usb_driver into rowboat gadget.

Select File->New Project, and click Android->Android Project. You have options at this point - you can "Create a new project in workspace" and call it whatever you want. This will make a "hello world" template application. Or! You can select "Create project from existing source", and select SkeletonApp. I recommend you do this, and select SkeletonApp. If that doesn't work, then try to default app.


Step 5: Customize
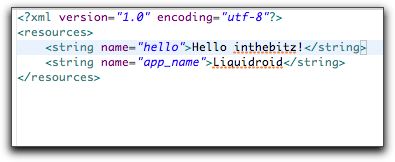
The most obvious thing to do is change the "Hello World" text. That's probably the safest way to go to start, just to make sure things are compiling properly. I've changed it to "Hello, inthebitz!" and voila - here it is, functionally working on the Android Embedded Hardware Development Kit:
Turns into this:


1 comment:
Nice tutorial.
I've been watching the android-related videos from Google IO conferences (2009 and 2010).
They are very useful for bootstrapping.
Post a Comment