Tuesday, October 28, 2008
The open source hardware cast of characters
For those just tuning in, I pulled together a little play called Open Source Hardware, Vol 1. If my English teacher taught me anything from those paperback copies of Shakespeare (you know, the ones with the notes on every other page that make the book twice as long), it's that every play must start with a "cast of characters". So before Act I, Arduino, comes "Introduction to the modules" over on the wiki. I also put in some definitions that I thought were useful as a start, so please feel free to add to the list!


Monday, October 27, 2008
Using the InputShield to make an Open Source Game boy
Ok, so ever since middle school I've wanted to make one of these... but I only now have enough know-how and support to make it, ... an Open Source game boy :) Actually, it's a little smaller than a game boy, but it's 1000% cooler (in my opinion) because it uses an Arduino as the "core", and a few modules and shields that already exist.

Here are a couple other pictures of the GamePack (it's like the GadgetPack, except in the free spot, I put the InputShield)... makes me wish I had a "hand model" like in Zoolander - ha:


Then I took a photo a little further back, and it had the cheapo home depot construction light that my friend uses to light up stuff (with a fluorescent bulb) in the picture, and it kind of looked like an alien was looking down at it, so I kept it:

I took this video as soon as I had everything up and running, and it's running the source code that's pasted at the bottom of the post...
Here's another video of pretty much the same thing...
I don't know if I really like the lighting in the videos, but I'm not a professional video taker, so I'll have to read up some books at Barnes and Noble around the corner and try to figure it out. I'm still using the same Aiptek mini HD recorder, and not some fancy equipment.
Anyway, here's the source code that runs on the Arduino:
And here's the source code that goes on the TouchShield:

Here are a couple other pictures of the GamePack (it's like the GadgetPack, except in the free spot, I put the InputShield)... makes me wish I had a "hand model" like in Zoolander - ha:


Then I took a photo a little further back, and it had the cheapo home depot construction light that my friend uses to light up stuff (with a fluorescent bulb) in the picture, and it kind of looked like an alien was looking down at it, so I kept it:

I took this video as soon as I had everything up and running, and it's running the source code that's pasted at the bottom of the post...
Here's another video of pretty much the same thing...
I don't know if I really like the lighting in the videos, but I'm not a professional video taker, so I'll have to read up some books at Barnes and Noble around the corner and try to figure it out. I'm still using the same Aiptek mini HD recorder, and not some fancy equipment.
Anyway, here's the source code that runs on the Arduino:
#include
#define RXPIN 3
#define TXPIN 2
AFSoftSerial mySerial = AFSoftSerial(RXPIN, TXPIN);
unsigned char x=0;
void setup()
{
mySerial.begin(9600);
/* Sync up by waiting for character */
while(mySerial.read() != 'U');
}
void loop()
{
/* The first analog pin sent */
x=0;
/* send 6 Analog Pin values */
while (x <>
{
serial_sendAnalog(x);
x++;
}
delay(10);
x=0;
while(x<>
{
serial_sendDigital(x);
x++;
}
delay(100);
}
void serial_sendDigital(unsigned char digitalPin)
{
if ( (digitalPin <> 13) )
return;
mySerial.print((unsigned char)digitalRead(digitalPin));
delay(2);
}
void serial_sendAnalog(unsigned char analogPin)
{
unsigned char lowByte, highByte;
unsigned int val;
/* Pin number range check */
if (analogPin > 6)
return;
/* Get the value */
val = analogRead(analogPin);
/* Separate the value into 2 bytes */
lowByte = (unsigned char)val;
highByte = (unsigned char)(val >> 8);
/* Send the high byte */
mySerial.print(highByte);
/* Write delay */
delay(1);
/* Send the low byte */
mySerial.print(lowByte);
/* Write delay */
delay(1);
}
And here's the source code that goes on the TouchShield:
COLOR green = { 0, 255, 0 };
COLOR blue = {0,0,255};
COLOR yellow = {255,255,0};
COLOR black = {0,0,0};
COLOR white = {255,255,255};
COLOR grey = {0x77,0x77,0x77};
COLOR red = {255,0,0};
POINT my_point;
unsigned int analogValues[6];
unsigned char digitalValues[10];
LCD_RECT digitalRect = { 118, 15, 127, 115 };
LCD_RECT analogRect = {0, 60, 32, 121 };
unsigned char x;
void setup()
{
Serial.begin(9600);
delay(3000);
/* The sync character */
Serial.print('U');
}
unsigned int oldx, oldy, newx, newy;
int erasemode = 2;
int pencolor = 1;
void loop()
{
//digitalValues[0] - digital pin 4, button A MODEA
//digitalValues[1] - digital pin 5, button B MODEA
//digitalValues[4] - digital pin 8, button A MODEB
//digitalValues[5] - digital pin 9, button B MODEB
//analogValues[5] - joystick y, MODEA
//analogValues[4] - joystick x, MODEA
//analogValues[3] - joystick y, MODEB
//analogValues[2] - joystick x, MODEB
//Read analog values
analogValues[0] = (Serial.read() <
<>
analogValues[1] = (Serial.read() <
<>
analogValues[2] = (Serial.read() <
<>
analogValues[3] = (Serial.read() <
<>
analogValues[4] = (Serial.read() <
<>
analogValues[5] = (Serial.read() <
<>
//Read digital values:
//Read digital values
digitalValues[0] = Serial.read();
digitalValues[1] = Serial.read();
digitalValues[2] = Serial.read();
digitalValues[3] = Serial.read();
digitalValues[4] = Serial.read();
digitalValues[5] = Serial.read();
digitalValues[6] = Serial.read();
digitalValues[7] = Serial.read();
digitalValues[8] = Serial.read();
digitalValues[9] = Serial.read();
if (touch_get_cursor(&my_point)) {
lcd_clearScreen( black);
}
newx=3+(1023-analogValues[5])*.12;
newy=3+(1023-analogValues[4])*.12;
if (erasemode && ((oldx != newx) (oldy != newy))) {
lcd_circle(oldx,oldy,5, black, black);
}
if (pencolor == 1) {
lcd_circle(newx,newy,5, blue, blue);
} else if (pencolor == 2) {
lcd_circle(newx,newy,5, green, green);
} else if (pencolor == 3) {
lcd_circle(newx,newy,5, red, red);
} else {
lcd_circle(newx,newy,5, white, white);
}
if (!digitalValues[0]) {
erasemode = !erasemode;
}
if (!digitalValues[1]) {
pencolor++;
if (pencolor == 5) {
pencolor = 1;
}
}
oldx=newx;
oldy=newy;
}
Introducing the InputShield
The InputShield is a shield for the Arduino that gives it a joystick and two buttons (A and B). That means I can connect it on top of the Arduino, and read in the X and Y coordinates over the analog input pins. I can also read the values of buttons 1 and 2 with digital read functions, so it's pretty straightforward to code too (code at the bottom).

I glued a small vibrator motor to the back of the board too, so it can be used to give a little bit of "force feedback" :-) I don't have a clean shot of the back yet, but here are some up-close pictures. You can see the double-stacked right angle female pin header on the top of the board, which I put so I can still fit solid core wires in and access power, ground, and the other digital pins (for when I wire up an accelerometer):

The InputShield comes with PCB traces for different types of layouts (partly because Chris is a lefty and I'm a righty). That way, when it's a kit, I can solder the joystick or buttons in one configuration or the other:

My friend showed me how to take 3D perspective shots like he used to, so believe it or not... I actually took this photo! (no, seriously... although I didn't set up the lighting or the camera settings - I don't even know what camera settings mean or do):

I spent almost all weekend soldering a few of these up, and then taking photos with the camera (they're all on Flickr), and I also wrote some small code to read the values using the Arduino:
void setup()
{
Serial.begin(9600);
pinMode(7,OUTPUT);
digitalWrite(7,LOW);
pinMode(11,OUTPUT);
digitalWrite(11,HIGH);
digitalWrite(4, HIGH); pinMode(4, INPUT);
digitalWrite(5, HIGH); pinMode(5, INPUT);
digitalWrite(6, HIGH); pinMode(6, INPUT);
digitalWrite(8, HIGH); pinMode(8, INPUT);
digitalWrite(9, HIGH); pinMode(9, INPUT);
digitalWrite(10, HIGH); pinMode(10, INPUT);
}
void loop()
{
Serial.print(" L1: ");
Serial.print((unsigned int)analogRead(5));
Serial.print(" V1: ");
Serial.print((unsigned int)analogRead(4));
Serial.print(" L2: ");
Serial.print((unsigned int)analogRead(3));
Serial.print(" V2: ");
Serial.print((unsigned int)analogRead(2));
Serial.print(" B1: ");
Serial.print((unsigned int)digitalRead(4));
Serial.print(" B2: ");
Serial.print((unsigned int)digitalRead(5));
Serial.print(" B3: ");
Serial.print((unsigned int)digitalRead(6));
Serial.print(" B5: ");
Serial.print((unsigned int)digitalRead(8));
Serial.print(" B6: ");
Serial.print((unsigned int)digitalRead(9));
Serial.print(" B7: ");
Serial.print((unsigned int)digitalRead(10));
Serial.print("\n");
digitalWrite(7,LOW);
delay(200);
digitalWrite(7,HIGH);
delay(200);
}
I'll put the InputShield up on the store over at Liquidware... and I'll also upload a couple of videos of the other stuff I made with it.

I glued a small vibrator motor to the back of the board too, so it can be used to give a little bit of "force feedback" :-) I don't have a clean shot of the back yet, but here are some up-close pictures. You can see the double-stacked right angle female pin header on the top of the board, which I put so I can still fit solid core wires in and access power, ground, and the other digital pins (for when I wire up an accelerometer):

The InputShield comes with PCB traces for different types of layouts (partly because Chris is a lefty and I'm a righty). That way, when it's a kit, I can solder the joystick or buttons in one configuration or the other:

My friend showed me how to take 3D perspective shots like he used to, so believe it or not... I actually took this photo! (no, seriously... although I didn't set up the lighting or the camera settings - I don't even know what camera settings mean or do):

I spent almost all weekend soldering a few of these up, and then taking photos with the camera (they're all on Flickr), and I also wrote some small code to read the values using the Arduino:
void setup()
{
Serial.begin(9600);
pinMode(7,OUTPUT);
digitalWrite(7,LOW);
pinMode(11,OUTPUT);
digitalWrite(11,HIGH);
digitalWrite(4, HIGH); pinMode(4, INPUT);
digitalWrite(5, HIGH); pinMode(5, INPUT);
digitalWrite(6, HIGH); pinMode(6, INPUT);
digitalWrite(8, HIGH); pinMode(8, INPUT);
digitalWrite(9, HIGH); pinMode(9, INPUT);
digitalWrite(10, HIGH); pinMode(10, INPUT);
}
void loop()
{
Serial.print(" L1: ");
Serial.print((unsigned int)analogRead(5));
Serial.print(" V1: ");
Serial.print((unsigned int)analogRead(4));
Serial.print(" L2: ");
Serial.print((unsigned int)analogRead(3));
Serial.print(" V2: ");
Serial.print((unsigned int)analogRead(2));
Serial.print(" B1: ");
Serial.print((unsigned int)digitalRead(4));
Serial.print(" B2: ");
Serial.print((unsigned int)digitalRead(5));
Serial.print(" B3: ");
Serial.print((unsigned int)digitalRead(6));
Serial.print(" B5: ");
Serial.print((unsigned int)digitalRead(8));
Serial.print(" B6: ");
Serial.print((unsigned int)digitalRead(9));
Serial.print(" B7: ");
Serial.print((unsigned int)digitalRead(10));
Serial.print("\n");
digitalWrite(7,LOW);
delay(200);
digitalWrite(7,HIGH);
delay(200);
}
I'll put the InputShield up on the store over at Liquidware... and I'll also upload a couple of videos of the other stuff I made with it.
Friday, October 24, 2008
Getting to know your Arduino...
It's been crazy busy over here, so I haven't had a chance to put up too much over on the wiki. So with what time I did have, I uploaded the most basic, fundamental chapter- Getting to know your Arduino! For the true beginner, like myself. Actually, Matt and I had a little debate over what to put in here, but we ended up keeping it on the leaner side. So if you've got something to add, here's your chance to do it!
On another note- thanks for all the support on the book! I've shipped a couple out and only have one copy left (okay so I didn't start out with that many) but quite thrilled nonetheless. I can't wait to get some input as the book on open source hardware itself becomes open source!
On another note- thanks for all the support on the book! I've shipped a couple out and only have one copy left (okay so I didn't start out with that many) but quite thrilled nonetheless. I can't wait to get some input as the book on open source hardware itself becomes open source!
Tuesday, October 21, 2008
Arduino: Custom Analog Voltage
If you’re like me, you always want what you can't have. Today it's an analog voltage output on Arduino's on pin 12.

The beauty of open source hardware and the Arduino is that there's a ton built-in functions. However, for a Pin Visualizer project I was working on I needed to output an analog voltage on a pin that didn't have hardware PWM.
So here's is a way to put an Analog Voltage on any pin.

Parts:
1. Arduino
2. 500 ohm resistor
3. 1uF Capacitor
Code:
/****************************/
/* Title: PWM on any pin */
/* By: Chris Ladden */
/* www.liquidware.org */
/****************************/
/* Analog output pin */
#define ANALOG_PIN 12
/* The PWM period. For smaller output caps, make this shorter */
#define PWM_PERIOD 100
void setup()
{
/* Make the pin an output */
pinMode(ANALOG_PIN, OUTPUT);
}
/* 20 = 20% duty cycle = 1.0 VDC */
/* 50 = 50% dutyCycle = 1.2 VDC */
/* 70 = 70% duty cycle = 3.5 VDC */
unsigned char dutyCycle=70;
volatile unsigned char x;
void loop()
{
/* Pin output, high */
digitalWrite(ANALOG_PIN, HIGH);
for (x=0;x
/* Pin output, low */
digitalWrite(ANALOG_PIN,LOW);
for (x=0;x< (PWM_PERIOD-dutyCycle);x++) { ; }
}

The beauty of open source hardware and the Arduino is that there's a ton built-in functions. However, for a Pin Visualizer project I was working on I needed to output an analog voltage on a pin that didn't have hardware PWM.
So here's is a way to put an Analog Voltage on any pin.

Parts:
1. Arduino
2. 500 ohm resistor
3. 1uF Capacitor
Code:
/****************************/
/* Title: PWM on any pin */
/* By: Chris Ladden */
/* www.liquidware.org */
/****************************/
/* Analog output pin */
#define ANALOG_PIN 12
/* The PWM period. For smaller output caps, make this shorter */
#define PWM_PERIOD 100
void setup()
{
/* Make the pin an output */
pinMode(ANALOG_PIN, OUTPUT);
}
/* 20 = 20% duty cycle = 1.0 VDC */
/* 50 = 50% dutyCycle = 1.2 VDC */
/* 70 = 70% duty cycle = 3.5 VDC */
unsigned char dutyCycle=70;
volatile unsigned char x;
void loop()
{
/* Pin output, high */
digitalWrite(ANALOG_PIN, HIGH);
for (x=0;x
/* Pin output, low */
digitalWrite(ANALOG_PIN,LOW);
for (x=0;x< (PWM_PERIOD-dutyCycle);x++) { ; }
}
Open Source Hardware book - Table of Contents
Here's the table of contents for the Open Source Hardware book. One of the original ideas of the book was to help students of industrial or product design classes use the Arduino as a platform to build gadgets and devices. I took a course similar to that a long time ago, and was frustrated that the course never got past switches and LED circuits. I had the hardest time extrapolating from what I was learning to image how I was actually going to use what I learned to build a real product.
Instead, Justin and I organized the book as though I was taking the class all over again. First I would have wanted to know a little about the concepts, and what open source hardware and gadget design was all about. Then, I'd want to spend a brief time on the basics, but mostly dive straight into the design of an actual gadget. So at the end of it all, I hope the book reads like that course could have gone (maybe in a parallel universe).
When I took the course, my final project was a "simple simon" game circuit (the kind where it plays a sequence on 4 LED buttons, and you have to type it back in the same order). I like to think that if I had this book back then, my final project would have been an MP3 player, or GPS device (which is what I had wanted to make in the first place!).
Open Source Hardware - Volume 1
Do-It-Yourself Gadgets
Foreword.. i
Introduction.. 1
How to use this book. 8
Getting to know your Arduino.. 10
Terms used throughout the book. 23
Arduino.. 25
Arduino + Breadboard + LEDs. 43
Arduino + Digital input switches. 54
Arduino + Analog inputs. 62
Arduino + Lithium Backpack. 69
Arduino + TouchShield.. 76
Arduino + ProtoShield + GPS. 109
Arduino + ProtoShield + Accelerometer 117
Arduino + ProtoShield + Ping Sensor 128
Arduino + Motor board + Motor 135
Arduino + Lithium Backpack + TouchShield.. 142
Arduino + ExtenderShield + ProtoShield + TouchShield + BackPack + Accelerometer 163
An open source project 173
Additional resources 174
My Own Device (I). 176
My Own Device (II)
Instead, Justin and I organized the book as though I was taking the class all over again. First I would have wanted to know a little about the concepts, and what open source hardware and gadget design was all about. Then, I'd want to spend a brief time on the basics, but mostly dive straight into the design of an actual gadget. So at the end of it all, I hope the book reads like that course could have gone (maybe in a parallel universe).
When I took the course, my final project was a "simple simon" game circuit (the kind where it plays a sequence on 4 LED buttons, and you have to type it back in the same order). I like to think that if I had this book back then, my final project would have been an MP3 player, or GPS device (which is what I had wanted to make in the first place!).
Open Source Hardware - Volume 1
Do-It-Yourself Gadgets
Foreword.. i
Introduction.. 1
- What is open source hardware?. 1
- What is physical computing?. 3
- What are modular electronics?. 5
- What is the Arduino?. 6
How to use this book. 8
Getting to know your Arduino.. 10
- Landmarks on the Arduino Diecimila board.. 12
- Installing the Arduino programs on your desktop.. 13
- Navigating the Arduino programming environment 14
- Introduction to the modules. 16
Terms used throughout the book. 23
Arduino.. 25
- Hello world program... 26
- Communicating between the Arduino and PC over serial 32
- Blinking the onboard LED on pin 13. 38
Arduino + Breadboard + LEDs. 43
- Knight Rider with LEDs. 44
Arduino + Digital input switches. 54
Arduino + Analog inputs. 62
- Battery Tester 63
Arduino + Lithium Backpack. 69
- Portable LED blinker 70
Arduino + TouchShield.. 76
- How to Program the TouchShield.. 77
- Basic Squares. 81
- TouchShield Hello World.. 85
- Reaction Time Game.. 90
- Stoplight. 95
- Countdown Timer 99
- Battery Life Monitor 104
Arduino + ProtoShield + GPS. 109
- Serial GPS reader 110
Arduino + ProtoShield + Accelerometer 117
- Gravity Tester: Basic input and output over serial 118
Arduino + ProtoShield + Ping Sensor 128
- Burglar Alarm... 129
Arduino + Motor board + Motor 135
- Basic control of a motor 136
Arduino + Lithium Backpack + TouchShield.. 142
- Pin Visualizer 143
- BitDJ. 155
Arduino + ExtenderShield + ProtoShield + TouchShield + BackPack + Accelerometer 163
- Acceleration meter 164
An open source project 173
Additional resources 174
My Own Device (I). 176
My Own Device (II)
Chapters from the Open Source Hardware Book
Well, there goes all the copies of the book Justin helped to write and make... it definitely seems like a lot of folks are interested in learning more about projects. I asked Justin to set aside a copy of the book for a friend of mine, who flies a lot, and codes his Arduino on flights (I can just imagine the looks he gets from anyone sitting next to him). I also got a fair number of emails over the past couple of days asking for more copies, and details, and sample chapters. So Justin and I decided to start uploading the table of contents and a few chapters of the "book" over to the wiki. It'll take some time to get all the formatting right, so I'll try my best to upload a couple of the first chapters in the next week or so (and I'll also post it here on the blog too). I guess you could sort of call it another book in the growing library of "open source hardware".
Anyway, to start things off, I wanted to pay my thanks to everyone who helped out over the past few months. The opening pages of the book includes a caption dedicating the book to:
These folks were especially helpful and supportive in helping me learn the Arduino platform back when I first picked it up, so I'm especially thankful to them! However, I'm sure this list will continue to grow longer and longer over the next couple of months.
Anyway, to start things off, I wanted to pay my thanks to everyone who helped out over the past few months. The opening pages of the book includes a caption dedicating the book to:
David Mellis, Arduino Core Team
Nathan Seidle, Sparkfun
Phil Torrone, Make Magazine
David Cuartielles, Arduino Core Team
Limor Fried, Adafruit Industries
Tom Igoe, New York University
Nathan Seidle, Sparkfun
Phil Torrone, Make Magazine
David Cuartielles, Arduino Core Team
Limor Fried, Adafruit Industries
Tom Igoe, New York University
These folks were especially helpful and supportive in helping me learn the Arduino platform back when I first picked it up, so I'm especially thankful to them! However, I'm sure this list will continue to grow longer and longer over the next couple of months.
Cheers for open source hardware!
I just saw this article over at Wired online, and I have to say it makes me really proud to see so many people in a real publication that I've actually met and talked to. I think this is a really great day (month?) in general for Open Source hardware, especially now that the community is growing faster and increasingly more mainstream. In fact, one of my friends from grade school even read the article and sent it to me over email (he was definitely in for a surprise when I sent him a link to liquidware and said, yep, I know!).
(It also answers a nagging question I've had in the back of my mind... what do some of these Arduino folks actually look like... ha)
Anyway, here's one for Open Source Hardware.
Hazzah!
(It also answers a nagging question I've had in the back of my mind... what do some of these Arduino folks actually look like... ha)
Anyway, here's one for Open Source Hardware.
Hazzah!
Monday, October 20, 2008
My mom's not as interested in the Arduino as I am
I went home this weekend carrying my newfound treasure- a shining, shimmering copy of Open Source Hardware, Volume 1: Do-It-Yourself Gadgets. It reminded me of that time I brought home my very first book report to show my mom (I got a B+, in case you're wondering, and no, it wasn't good enough).
Me: You know that electronics stuff I've been playing with? The Arduino?
Mom: Yeah?
Me: I typed up my notebook and turned it into a real book! Pictures, barcodes, and everything! It's about all the stuff I learned...maybe you want to try it out? (hand book to Mom)
Mom: (flipping through) It's so glossy...so many pictures. Where are all the words?
Me: It's supposed to be illustrative, step-by-step, so you know what you're doing...it's not a novel.
Mom: (closes book) I thought you were going to be a doctor. When are you applying to med school? You're still applying, right?
Me: (awkward silence)
Well, my mom thinks it's a nice looking book, but isn't really interested in learning about our dearest Arduino & friends, so I've got just a couple extra copies lying around from the batch I printed. Hopefully someone thinks otherwise :-) If you're interested, I have it up over on the Liquidware site.
Also, I slipped in the thinnest USB stick I could find (the Kingmax SuperStick) with source code and other handy files, so you'll really have a treasure trove of projects to get you going once you pick this up! I'm still relatively new to all of this (book printing, Arduino, GIMPShop, you name it) so I'm sure there will be another revision sometime soon!
Me: You know that electronics stuff I've been playing with? The Arduino?
Mom: Yeah?
Me: I typed up my notebook and turned it into a real book! Pictures, barcodes, and everything! It's about all the stuff I learned...maybe you want to try it out? (hand book to Mom)
Mom: (flipping through) It's so glossy...so many pictures. Where are all the words?
Me: It's supposed to be illustrative, step-by-step, so you know what you're doing...it's not a novel.
Mom: (closes book) I thought you were going to be a doctor. When are you applying to med school? You're still applying, right?
Me: (awkward silence)
Well, my mom thinks it's a nice looking book, but isn't really interested in learning about our dearest Arduino & friends, so I've got just a couple extra copies lying around from the batch I printed. Hopefully someone thinks otherwise :-) If you're interested, I have it up over on the Liquidware site.
Also, I slipped in the thinnest USB stick I could find (the Kingmax SuperStick) with source code and other handy files, so you'll really have a treasure trove of projects to get you going once you pick this up! I'm still relatively new to all of this (book printing, Arduino, GIMPShop, you name it) so I'm sure there will be another revision sometime soon!
Sunday, October 19, 2008
Duemilanove -> 2009
A new bread of the Arduino board has finally been released to the community!
 I just bought a bunch of Duemilanoves so I can sell them on Liquidware. They aren't in stock at the current time, but I will be accepting back orders. The last I checked they were already in the mail on the way to my apartment.
I'm so excited :o)
-Mike
- It is called the Arduino Duemilanove (2009).
- The new board has an automatic power select between the USB port or the DC Power plug.
- According to David Mellis, the Duemilanove will be replacing the Diecimila.
 I just bought a bunch of Duemilanoves so I can sell them on Liquidware. They aren't in stock at the current time, but I will be accepting back orders. The last I checked they were already in the mail on the way to my apartment.
I'm so excited :o)
-Mike
Friday, October 17, 2008
You've got mail...a 10 lb package, to be exact
I'm really pumped...all that money I spent on speedy shipping was so worth the near-instant gratification of having it printed and delivered in 2 days. I'm not gonna lie, I splurged a little :-) But I've never done this before, and something told me it would be way better than just having a PDF or printing it out on my good old inkjet.
And the coil bound...just seemed too much like the notebook I already had. It reminded me of a project I had in 7th grade, where we pulled together our "portfolio" of work, then sent it off to have it hardcover bound. Almost.
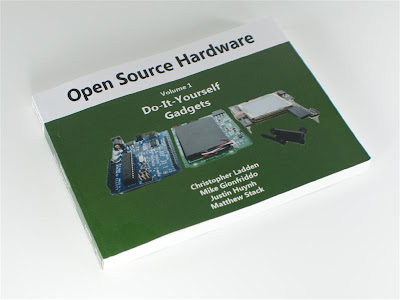
Alright, alright, without further ado, the first snapshots of the book! And boy does it look like a real book!! Matt, Chris, and Mike were awesome teachers throughout this whole process, so hopefully I can pass on some of what I've learned too.
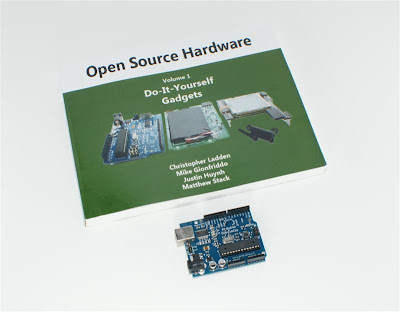
Here's a shot of the book with the Arduino:
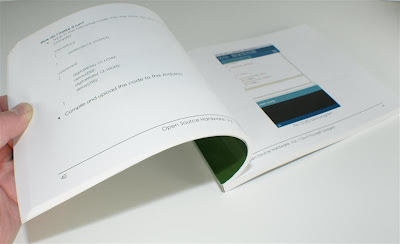
And a couple shots of how the inside turned out. The paper was great, and I'm really thrilled, if you can't tell!
 Well, I have a few copies and I can't wait until my friends and family see this. I'm gonna get them all hooked on the Arduino...and boy would my science teacher be proud!
And the coil bound...just seemed too much like the notebook I already had. It reminded me of a project I had in 7th grade, where we pulled together our "portfolio" of work, then sent it off to have it hardcover bound. Almost.
Alright, alright, without further ado, the first snapshots of the book! And boy does it look like a real book!! Matt, Chris, and Mike were awesome teachers throughout this whole process, so hopefully I can pass on some of what I've learned too.

Here's a shot of the book with the Arduino:

And a couple shots of how the inside turned out. The paper was great, and I'm really thrilled, if you can't tell!

 Well, I have a few copies and I can't wait until my friends and family see this. I'm gonna get them all hooked on the Arduino...and boy would my science teacher be proud!
Wednesday, October 15, 2008
They called me a n00b...
...And I wanted to do something about it. So I started learning to play on the Arduino. It's just one of those things you gotta jump right into, get your hands dirty- and that's just what I did. This is probably your story too.
I took notes along the way. And some pictures too. But having jumped in helter skelter, I also realize that there were some projects which would have helped me earlier, rather than later. And some stuff is just nice to build off of. So I started to organize my notebook into a booklet of tutorials for others like me.
Anyways, I began typing up my notes and organized the pictures. And what started out as a little booklet slowly became a bloated word document, and I figured, why the hell not. With all the pretty pictures I took with Matt's snazzy new camera, I really didn't want it to go to waste. Maybe I can even help out someone in my shoes :-)
I've even drafted a (very amateurish) cover in GIMPshop, and I decided to print a couple copies at Lulu.com. They even gave me a barcode!! Okay well I'm getting way too excited but I've never printed a book before, so I can't wait till they get here. Stay tuned...promise I'll post pics!
I took notes along the way. And some pictures too. But having jumped in helter skelter, I also realize that there were some projects which would have helped me earlier, rather than later. And some stuff is just nice to build off of. So I started to organize my notebook into a booklet of tutorials for others like me.
Anyways, I began typing up my notes and organized the pictures. And what started out as a little booklet slowly became a bloated word document, and I figured, why the hell not. With all the pretty pictures I took with Matt's snazzy new camera, I really didn't want it to go to waste. Maybe I can even help out someone in my shoes :-)
I've even drafted a (very amateurish) cover in GIMPshop, and I decided to print a couple copies at Lulu.com. They even gave me a barcode!! Okay well I'm getting way too excited but I've never printed a book before, so I can't wait till they get here. Stay tuned...promise I'll post pics!
Subscribe to:
Posts (Atom)