Friday, August 29, 2008

Burning Man 2009 desktop count-down

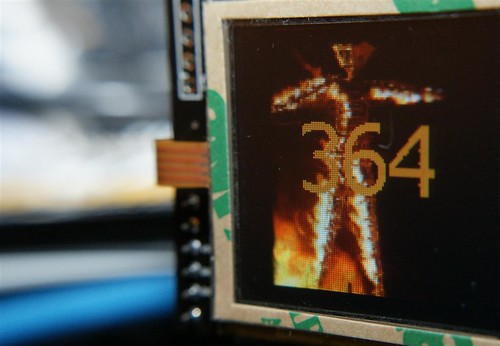
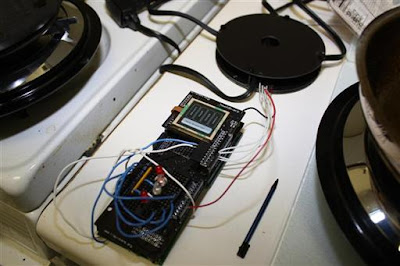
Burning Man 2008 week is wrapping up, and I know quite a few folks that consider burning man to be the beginning and end to their year (just about replacing New Years)! So to commemorate the coming Burning Man 2009 year, I wrote a little program on the TouchSheild to count down the days until next time. I hope you enjoy it!

Arduino TouchShield 4 Burning man by you.


Arduino and TouchShield Burning Man 2009 countdown from Matt Bitz on Vimeo.


Arduino and TouchShield Burning Man 2009 from Matt Bitz on Vimeo.

Touching to advance 2 by you.


I've just uploaded all the source code, pictures, and image uploader utility over at the projects page.

Arduino TouchShield burning man counter by you.


For a shortcut, here's the source code for the TouchShield:

#include "touchLargeNums.h" 

largeNum myFont = largeNum();
POINT p;
unsigned long days;
char out[5];
COLOR c = {236,191,51};
int demo = 0;
int demodelay = 100;
int numpix = 4;

void setup()
{
//uncomment this to stall the touchshield into picture uploading mode
//image_interface_begin();
days = 365;//365;
myFont.setForeColor(c);

numpix = 4;
}

void loop()
{
for(int i=0;i<numpix;i++){
if (i==0) bmp_draw("burn001",0,0);
if (i==1) bmp_draw("burn002",0,0);
if (i==2) bmp_draw("burn003",0,0);
if (i==3) bmp_draw("burn004",0,0);

printbignum(days--);
if (days == -1) {
while(!touch_get_cursor(&#38;p)){};
days = 365;
};
if (!demo) {
while(!touch_get_cursor(&#38;p)){};
} else {
delay(demodelay);
};

}

} //end loop

void printbignum(unsigned int num) {
int len = 3;
//itoa(num,out,10);
dtostrf(num,3,0,out);
//dtostrf((unsigned int)out[1],3,0,out);
if (out[0]==32 &#38;&#38; out[1]==32) {
len=1;
} else if (out[0]==32 &#38;&#38; out[1]!=32) {
len=2;
}

if(len==2) {
dtostrf(num,2,0,out);
myFont.putst(out,10,15);
} else if (len==1) {
dtostrf(num,1,0,out);
myFont.putst(out,18,15);
} else if (len==3) {
dtostrf(num,3,0,out);
myFont.putsb(out,30,45);
}
}

Glamor shots with the Arduino

A friend of mine is a photographer, and he and I spent some time together this last weekend. He knows a lot about taking product photos, so he took a few, and taught me some tricks of the trade.
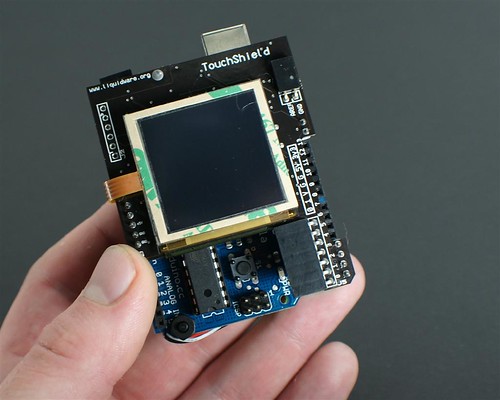
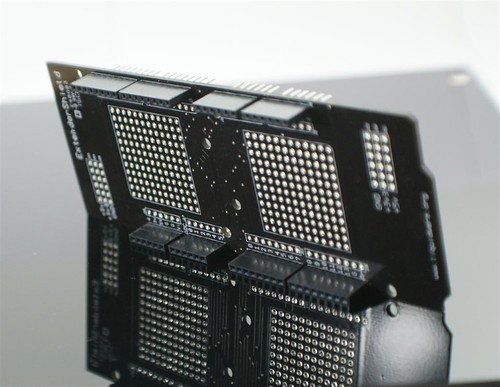
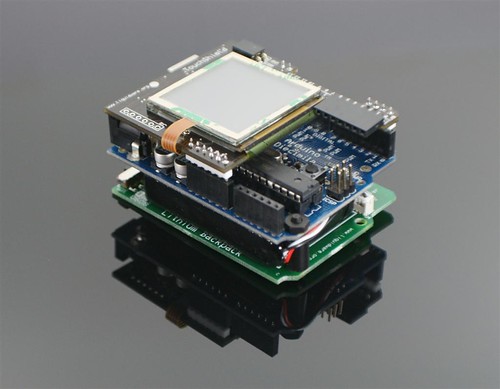
It just goes to show what a decent camera can really do - wow! It almost makes me want one, so I guess I'll have to start shopping around on Ebay for a decent used one :)

This is a shot of me holding the TouchShield with my hand:
Holding the Arduino TouchShield Lithium Backpack by you.

This is a really artsy-looking shot of the ExtenderShield:
ExtenderShield on its side by you.


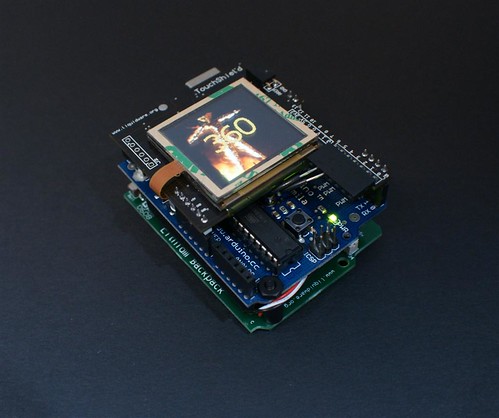
Here's the TouchShield, stacked on the Arduino, and Lithium Backpack:
Arduino TouchShield Lithium Backpack reflection by you.


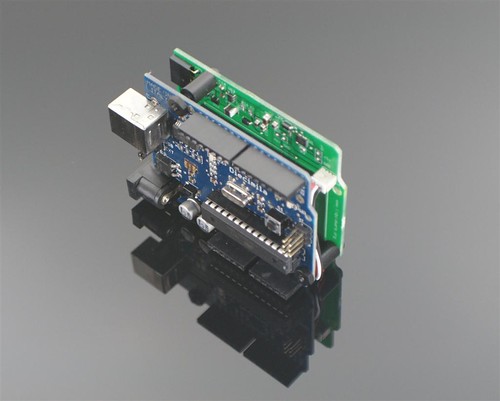
Here's a side shot of the Arduino and Lithium backpack:
Arduino Lithium Backpack side reflection by you.

And a solitary (aw, so lonely) shot of the Lithium Backpack:
Lithium Backpack for Arduino by you.

The full photo stream is over at Flickr, if you're interested :)

Thursday, August 28, 2008

How to communicate from the Arduino up to the TouchShield

Chris found a pretty compact way to send data from the Arduino up to the TouchShield. Since more and more projects that I'm building rely on this code, I figured I'd pull it out of the Pin Visualizer project, just to illustrate how it works. At the least, it sure beats trying to manually "bit-bang" across the pins!

On the Arduino, this code sends an unsigned integer up to the TouchShield, by sending the high byte first, then the low byte:

#include //include the serial library
#define RXPIN 3 //set up the receive pin
#define TXPIN 2 //and transmit pin, which will connect to software serial on the TouchShield
AFSoftSerial mySerial = AFSoftSerial(RXPIN, TXPIN); //init the software serial connection
mySerial.begin(9600); //and set the speed

while(mySerial.read() != 'U'); //wait until the TouchShield sends a sync character

unsigned char lowByte, highByte; //define this wherever you want to use the code below
unsigned int val = 123; //this is the value that will be sent

lowByte = (unsigned char)val; //extract the lower byte
highByte = (unsigned char)(val >> 8); //extract the upper byte
mySerial.print(highByte); //send the upper/high byte first
delay(1); //hang on a millisec
mySerial.print(lowByte); //send the low
delay(1); //hang on a millisec


On the TouchShield, this code accepts the high byte first, then the low byte, and then recombines them to make a single unsigned integer:


Serial.begin(9600); //set up the TouchShield serial connection
delay(3000); //and wait a little for the Arduino to boot up

Serial.print('U'); //send a sync character to the Arduino

unsigned int val; //define this variable in the function wherever you want to receive

val = (Serial.read() << 8) + Serial.read(); //read the high first, shift it up, then read the low

//Now you can use the val, which was sent from the Arduino

I hope it works for you! Let me know if you find anything cool to make with it...

Tuesday, August 26, 2008

You can find me in da club...

Oh boy. I’ve never really been the clubbing type. The music is too loud, the floor is cramped, and I find the crowd to be mildly obnoxious. Suffice to say clubs are generally not my venue of choice. It’s the weirdest thing, though, because I do like the crazy lights and powerful bass. Maybe it has something to do with being unhealthily mesmerized by oscillating screensavers since the age of 8, but that’s a story for a different day.

Well, it's a little more complex to program flashing lights that beat to the music, but here's the next best thing. And it tests your sense of rhythm too! Mike played this one (I just shot the video), and it's surprisingly easy to put together. It took me maybe 10 minutes to throw together, and then I spent forever playing our homebrewed version of "Spotlight" Hero. I even brought my girlfriend and resident Guitar Hero expert over to play a few rounds!


To build all this, I just connected some colored lights up to the RelaySquid, and then controlled them with a few digital switches that I picked up from RadioShack. The circuit itself was powered by a Lithium Backpack that I strapped on to the setup.

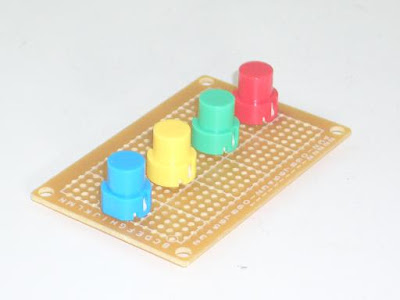
First, I set up the colored buttons- but any plain old switches will do.

Next I connected the other side of each button to the respective relay you want it to control, and then I then secured the Lithium Backpack to the PC Board with the 4 Buttons on it. After that I connected each Button to the RelaySquid Digital Input that controls it’s respective color output. That meant I took the wire from the blue button, and tied one end to +5V, and the other end I plugged into the labeled pin on the RelaySquid that corresponded to the blue light. I also connected the Lithium Backpack’s +5V and GND to the RelaySquid’s respective inputs on J8.

I turned on the Backpack and press the buttons to test each Squid Relay (you should hear a click with each press). When this test worked ok, I plugged in each AC plug (including the power input coming from the RelaySquid.


I made sure the lights were on, and then every time I pressed a button, the corresponding relay on the RelaySquid would turn on. That’s it! More details, pics and vids over on the projects page.

Monday, August 25, 2008

Arduino! Make me breakfast!

When I was younger, maybe when I was watching the Jetsons, I had a dream that someday, food would be super cheap and always perfect. Because we'd have robots do everything delicate work that only the world's finest chefs were capable of. The cool part was that you wouldn't have to pay robots to work and they could cook for you anytime you wanted. With dreams like these, it's no wonder I was more of a husky kid.

With the Arduino, I've put together what I hope will set in motion the R&D that will make my dream a reality. I decided to start with the first meal of the day, and the most important one I don't have on most days. To be honest, I’m usually running out the door in the morning, and I don’t have time to sit at the stove cooking a real meal and making watching the coffee maker for 15 minutes (that’s about how long it usually takes me).

So I hooked up a coffee maker, and two electric stove surfaces to the RelaySquid. Then I ran the RelaySquid with a slightly modified version of the BitDJ code, which I edited to make it time the signals to the RelaySquid to turn on the bacon hotplate for 7 minutes, followed by coffee for 2 minutes, and then the egg for 7 minutes (the coffee and egg run in parallel to start). The end result is crispy bacon that’s had a chance to dry out a little, coffee that’s not too hot, and a fresh hot egg!

To start out, I put together the device. I used a TouchShield on the top, with a small prototyping area so I could place down some LEDs (I’ll talk about those later). Then I put the Arduino on the back, and a Lithium backpack on the back too.

Here’s a picture of the controller, assembled:

The circuit is actually embarassingly basic… the TouchShield controls the Arduino, and tells it to turn on or off pins numbered 4, 5, 6, and 7. These pins are connected with wire to the RelaySquid. Arduino pin 4 is connected to the RelaySquid port 1, which is then connected to the coffee maker. Arduino pin 5 is connected to the RelaySquid’s port 2, which controls the egg hotplate, and pin 6 is connected to RelaySquid port 3, which controls the bacon hot plate. I had a toaster on the system for a while, but then I realized toasters are already easy enough to use!

I bought really low-end coffee maker and hot plates from Home Depot:

That’s all… the rest is source code, which you can find here

I took some videos too. When I started cooking:


A few minutes in:


All done!

Don't be a rectangle...

...Be a circle! Meet the RelaySquid. It's a circular PCB with four relays that each switch an extension cord on/off , all of which can be controlled by an I/O board like the Arduino.

Not to be confused with any other type of squid:

There's also a plug that goes into the wall to power each of these outlets, as well as pins that connect directly to the Arduino to control each of the relays, in addition to powering the circuit itself.

It's super easy to get up and running, even if you're new to the Arduino. The pins are arranged as follows:

Just plug G into the Power GND pin on the Arduino, and V into Power 5V on the Arduino, and then connect your Arduino pin to a relay pin. Once you start switching your pins on and off, you can hear the relays clicking!
Here's a quick video I made to demo the project. I'll post some code later today.


Why I like Make

Wow... I can already tell this is going to be a busy week for blog posts and projects. There's just so much to catch up on.

I can't believe it's Sunday night returning from vacation, and I'm literally glued to browser reading Make. The magazine is pretty inspirational to guys like me (I guess you'd call me an engineer, turned wannabe artist designer, turned hobbyist). If you haven't read it, I recommend it, and you can usually find it in Barnes & Noble. I've even started to leaf through Craft magazine, and that means I might have to start sharing some of the electronic clothing I've been making lately (but that's a longer story for another time).

But onto the good stuff... Who doesn't enjoy Make blog? I just spent the last 2.5 hours on there, browsing through all the ridiculously cool ideas everyone has out there. It's also worth noting that I'm pretty sure Philip (the guy who writes the blog) is an all-knowing genius. I don't know anyone else who picks up the kinds of projects he does from the far reaches of the net galaxy.... impressive.

On another note, I've also noticed a recent trend towards posting videos on Make blog with vimeo instead of youtube. I just tried it out, and I'm already convinced... cool stuff! Here are a few videos I've been waiting to upload of projects I made (I'll be sure to talk about how I made them later this week):


DJ Light Show with the RelaySquid from Matt Bitz on Vimeo.


Sonar Light DJ with RelaySquid from Matt Bitz on Vimeo.

Anyway, the best part of Make blog is the fact that they archive all the past posts in a really linear way, so it's easy enough to quickly flip through everything you missed over the last couple days (or week in my case). Thanks, Make!

I'm back!

Wow, that was pretty crazy! I'm finally back from vacation, and got a chance to get caught up on all kinds of stuff. Like links :)

I just stumbled across this video by Ladyada (looks really cool, and way to go with the high quality camera - I'm so jealous!). Also, that's a really cool opening animation they found.

I also finally got caught up on some emails, and lots of people emailed in saying thanks for the comparison article, but also, some corrections. Thanks a lot - I was hoping to make people's lives a little simpler by understanding which boards work with shields. Actually, if you interpretted the stars as performance or price, they're completely reshuffled. For instance, some of the boards are definitely cheaper than others. Of course I'll always favor the original Arduino, but that's just me :)

Finally, I got a chance to upload some videos and new changes to the web site that I've been really slacking on, but over the next couple days I'll polish it up, and hopefully that'll make the rest of the website easier to use. I hope it works!

Also, Justin's really excited because all the new PowerSquid's just came in, and he's going to write up a little post about them...

Sunday, August 10, 2008

Arduino Hardware Spinoff Comparison Guide

The Arduino platform is great for many things, but recently there's been a large number of spin offs, especially at the low-end of the spectrum. New entrants like the Sanguino, and the Skinny have come on to the scene to supplement older spinoffs like the Boarduino, Freeduino, and the Bare Bones Board.

This is all terribly confusing, so I've tried to write a little run down of each of the major spinoff core boards, and how they compare to the original.

(EDIT: Paul made a really good point - this review is especially written with a perspective on how well the spinoff boards interface with different shields out there. Actually, each one has it's own special niche right now that it's meant to serve. On the other hand, I think shields are really cool, so this is written from that "editorial bias" - ha!)

Arduino and Arduino Diecimila
Score: ***** (5 out of 5 stars)
The original Arduino, easy to program, comes pre-assembled, and is pin-compatible with all major shields available from liquidware, ladyada, and libelium. It's assembled, works out of the box, and can start running sketches and programs almost immediately. It's a blast to program, and downloading programs to it is really easy. By comparison, this board is a couple bucks more expensive than the other boards, but since it's pre-assembled, it's more than worth the few extra pennies. The biggest downside is that the name, "Diecimila" is perhaps one of the hardest words ever to spell (luckily Google is nice and usually suggests the correct spelling)!

Freeduino
Score: **** (4 out of 5 stars)
An early spinoff from Arduino, this project wanted to keep all the benefits of the Arduino without paying name royalties to the Arduino founders. Consequently, they came out with a cheaper, lower end board that retained most of the features of the Arduino. Most notably, this board is also pin-compatible with the Arduino, so it works with all shields. The downside, of course, is that the builders were a little design-challenged, so the board doesn't look as "finished" as the original Arduino.

Skinny
Score: ***+ (3.5 out of 5 stars)
A newer version from the guys over at Sparkfun, the Skinny is a curious little device. It doesn't support auto-reset programming, so programming the device might be a tad bit more complex than others on this page. Also, it's a slightly different form factor, that comes without pin towers, so a small amount of soldering is required. Personally, the red color is a little prettier than the blue of the Arduino, so that's a plus, but the downside is that it doesn't support any shields out of the box. It remains to be seen whether it would work with shields after a little soldering. The jury's out still on this one, but it could be a promising device if someone can find a way to make it support shields.

Boarduino
Score: ***+ (3.5 out of 5 stars)
A version of the Arduino that only plugs into a bread board. This board is meant to be a basic, entry level board, which typically comes as a kit. Unfortunately, I'm a beginner, so it took me a while to solder the thing together, but for others, here's a link to the do-it-yourself soldering instructions (thanks Jimmy). This version works well if you're interested in doing old-school breadboard lab-type projects on a budget, but for other new projects, the Arduino works better for me... Lastly, I give this one a slight edge for its slim form factor, which works well on breadboards, it's native habitat!

Bare Bones Board
Score: *** (3 out of 5 stars)
An interesting entrant into the mix, this one comes a little cheaper than the Arduino, but the funny thing is that it costs almost as much as the Arduino when fully assembled. The downside is that although it's about the same size as the Arduino, the pins are in completely different locations, so none of the shields made will work with this board... That's unfortunate :(

Sanguino
Score: ** (2 out of 5 stars)
Sold only as a kit (yet another kit!), the main purpose of this board was to introduce a more powerful board based on a bigger Atmel. However, the thing is quite big (maybe a little unweildy), and requires assembly as well. Gaging from the pictures, this one probably takes a few hours to assemble, which likely isn't worth it for the marginal increase in power. If it were up to me, I'd hang tight for the upcoming higher powered Arduino from the Arduino.cc core team, currently being designed by David Mellis!