The Crash Test Sensor is the newest sensor from the Liquidware and Modern Device joint engineering project.
Most handheld gadgets today have accelerometers, like my camera, which helps the camera detect whether I’m holding it portrait or landscape. The iPod Touch took it to a new level by adding a degree of sensitivity to orientation, which is pretty neat.
So Paul and I thought about what another level of accelerometer would look like, and we stumbled across the neat little ADXL278 chip from Analog Devices. It’s a dual-axis “high-g” accelerometer, which means that it can pick up on a much higher acceleration than the chip inside my camera that tells me which way my picture is facing. Like the acceleration just before impact if I threw my camera at a brick wall. Scientists use it test what kinds of injuries occur at what rates of acceleration- much like with crash test dummies.
Crash test dummies are actually much more complex than your average mannequin. They mimic average weight distributions of the human body, and there’s an entire field devoted to creating such anthropomorphic test devices.
I wasn’t in the mood to create an actual crash test dummy, and I’ve been looking for an excuse to play with RC cars again, so I put together an analog crash test sensing rig that lights up depending on degree of impact, and started running it into things :)
Step 0: Assemble the Crash Test Sensor
The Crash Test Sensor itself reads Xout, Yout, has a pin for self-test, and multiple pins to wire in Vin and Ground. It comes as a kit with two 6-pin male headers, which are pretty quick to solder up.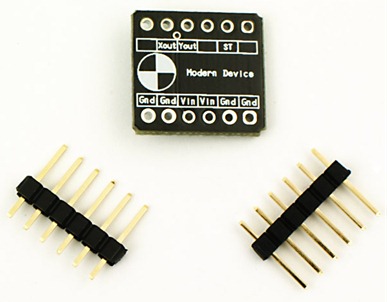 Step 1: Build CrashDuino Analog Arduino Crash Rig
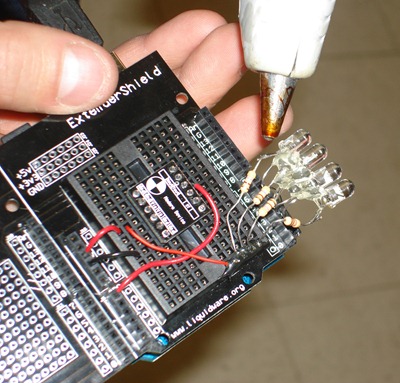
The “CrashDuino” rig consists of 4 white LEDs, which I soldered a 470 ohm resistor onto (to keep it fairly bright).
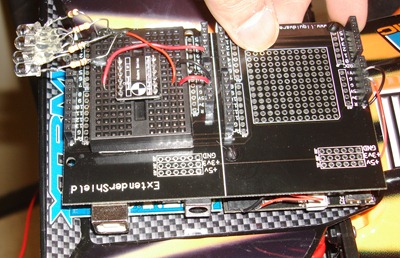
I then mounted the assembled Crash Test Sensor on a mini protoboard, which I stuck onto a DoubleWide ExtenderShield. I lined up the 4 LEDs to be controlled by Arduino digital pins, with the pins serving as Ground (or digital LOW) for the lights to go on.
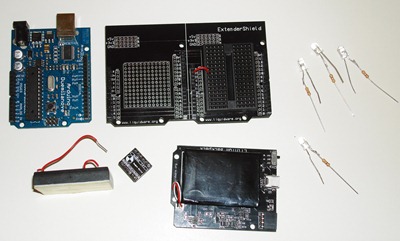 Here’s the CrashDuino rig with LEDs while I hot glued the leads in place:
Step 2: Write CrashDuino Impact Test Code
I wrote some code to take an analog read of Analog Pin 0, where I had the Xout linked, and if that value hit a certain threshold, one of the LEDs in sequence would light up. If impact was strong enough to pass the next threshold, the next level LED would light up, and so forth until there was a crash that had impact high enough to trigger all 4 LEDs.
#define TP1 518
#define TP2 519
#define TP3 521
#define TP4 522
#define TP5 523
#define DELAY 750
void setup() {
pinMode(2, OUTPUT);
pinMode(3, OUTPUT);
pinMode(4, OUTPUT);
pinMode(5, OUTPUT);
digitalWrite(2, HIGH);
digitalWrite(3, HIGH);
digitalWrite(4, HIGH);
digitalWrite(5, HIGH);
Serial.begin(115200);
}
int value;
void loop() {
value = analogRead(0);
value += analogRead(0);
value /= 2;
if ( (value > (TP1-1)) && (value < (TP2+1)) ) {
digitalWrite(2, LOW);
digitalWrite(3, HIGH);
digitalWrite(4, HIGH);
digitalWrite(5, HIGH);
//delay(DELAY);
} else if ((value > (TP2-1)) && (value < (TP3+1)) ) {
digitalWrite(2, LOW);
digitalWrite(3, LOW);
digitalWrite(4, HIGH);
digitalWrite(5, HIGH);
delay(DELAY);
} else if ((value > (TP3-1)) && (value < (TP4+1)) ) {
digitalWrite(2, LOW);
digitalWrite(3, LOW);
digitalWrite(4, LOW);
digitalWrite(5, HIGH);
delay(DELAY);
} else if ((value > (TP4-1)) && (value < (TP5+1))) {
digitalWrite(2, LOW);
digitalWrite(3, LOW);
digitalWrite(4, LOW);
digitalWrite(5, LOW);
delay(DELAY);
} else {
digitalWrite(2, HIGH);
digitalWrite(3, HIGH);
digitalWrite(4, HIGH);
digitalWrite(5, HIGH);
}
}
Step 3: Find the Perfect Radio-Controlled Car
I wanted something that would make somewhat of an impact, so I went out looking for the best value RC car that was:
a) big enough to hold a DoubleWide shield rig
b) looked like it had some juice to make a nice, reasonably fast crash (or at least a loud bang)
c) a car that I wouldn’t be heartbroken over if it broke
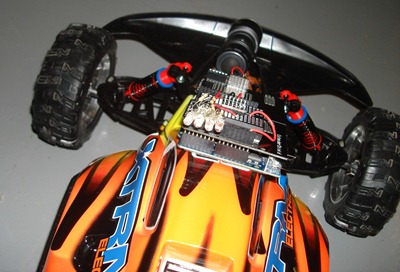
Because every toy store within 30 miles of me shut down over the past year, I ended up choosing between Target and Walmart, and grabbing one of these race cars:
Step 4: Mount the CrashDuino Rig
It actually took a couple tries to get it to work nicely, since the car was waaaay too well designed for a kid’s RC race car. The bumper was wide, to reduce the pressure on any point, and flexible yet sturdy, to absorb impact. The entire chassis was a lightweight, flexible plastic whose front and back areas crumpled just as much on impact, to absorb energy of impact and protect the cabin and passengers inside. Not to mention the mini hydraulic suspension and springs on each wheel…toys have come a long way since I was a kid!
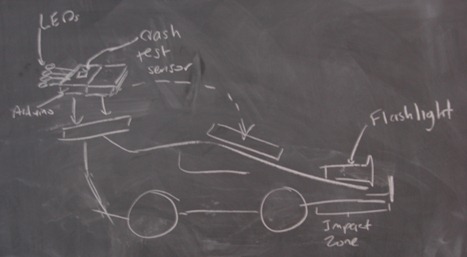
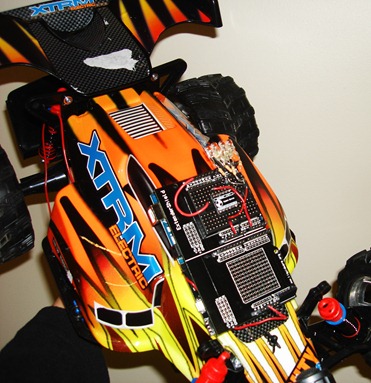
While this was excellent for the imaginary race car driver in my RC vehicle, this actually made it harder to detect high-g’s, well, simply because all the impact was absorbed! I originally had the CrashDuino rig mounted on the spoiler, but because the spoiler was attached separately (and on similarly bumper-like plastic), I had to move the rig closer to the point of contact on the car. I used a double-sided foam adhesive to stick the shields onto the plastic chassis.
Step 5: Crash!
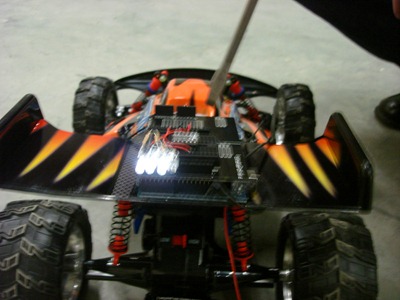
Here’s a couple more snapshots of the finished rig with the CrashDuino on the car:
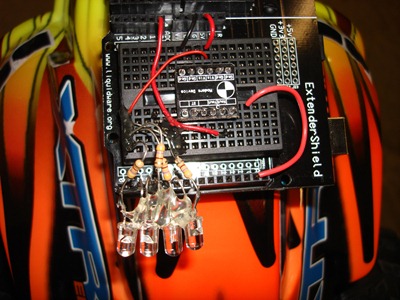
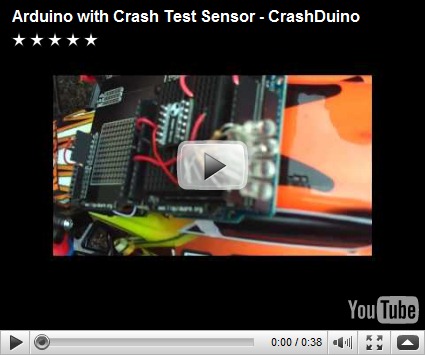
 And here’s a video of the second trial, with the Crash Test Sensor mounted on the front chassis:
I’ll be working on a digital version that reads out this info in real time, maybe with the TouchShield Slide. Paul’s got the Crash Test Sensor posted over at the Modern Device shop.
Now if I could figure out a way to mount it to a rocket… :)

2 comments:
Very cool, it has lots of practical uses. I'll most likely get one.
that was cool... the leds were a little hard to see, but i'd love to play with that code too... is the code somewhere where i can try it out, maybe?
Post a Comment