Chris also spent a bunch of time coding up a special version of the Antipasto Arduino IDE (the Antipasto branch of the Arduino IDE), so that anyone who wants can literally pick up the TempSensor, wire it into analog ports 2, 3, 4 and 5, and be up and running in no time.
Here's proof:
Step 1: Download the Antipasto Arduino IDE
First download the Arduino IDE from here.
Install it and test out a simple Blink sketch on the Arduino to ensure that it works
Step 2: Connect the TempSensor to the ArduinoInsert the pins so that the TempSensor is facing downwards, off the bottom of the Arduino.
The TempSensor's pins should be placed into the Arduino's analog header, into pins 2, 3, 4, and 5.
Step 3: Load the Example Code
This is from the File->Examples->Library-LibTemperature->GetLocalTemperature menu option.
/****************************

* GetLocalTemperature

*  An example sketch that prints the

*  local temperature to the PC's serial port

*

*  Tested with the TMP421-Breakout

*  Temperature Sensor from Modern Device

*****************************/

#include "Wire.h"

#include


LibTemperature temp = LibTemperature(0);


void setup() {

 Serial.begin(9600);

}


void loop() {

Serial.print("Temp: ");

Serial.print(temp.GetTemperature());

Serial.println(" degC");

delay(100);

}
Step 4: Hit Compile
This is the little triangular button.
Step 5: Download the Program to the Arduino
Select the right port, and the right Arduino board, naturally, and then press download.
Step 6: Open the Serial Terminal
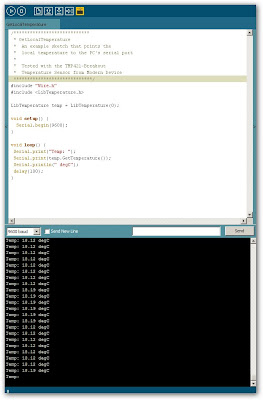
And you'll see something like this:

Voila!
1 comment:
I tried this setup and it did not work for me. I get an error: "oops, there was hardcore error on thread (name 'main': message 'null"). Arduino must now quit."
This happens each time I try to stat the copy of Arduino that I downloaded from this site.
I also tried to insert the LibTemperature folders in Arduino 18 directory Arduino\hardware\cores\arduino\src\components\library. This also failed.
Post a Comment