Last week, Chris and I hacked the 3-Axis accelerometer into the remote for an RC car, making it “drive by gravitation”. It turned out to be a little more complicated than expected, since the remote actually used a potentiometer to affect the radio frequency transmitted, which in turn altered the velocity of the car.
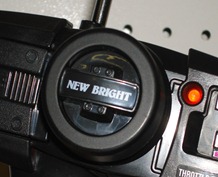
The controls on the remote were split into two parts, a steering knob, which made three contact points on the remote control PCB…
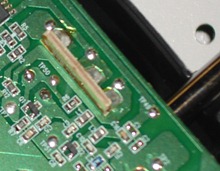
And a velocity trigger, which controlled the speed as well as backward/forward direction… 
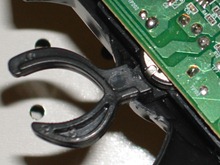
The left/right steering knob was a pretty simple switch, and connecting one pair of contacts made the wheels turn left, and connecting another pair of contacts made the wheels turn right:
I simply wired these to a set of Arduino Digital Pins, so they could be controlled from the software.
Tweaking the velocity trigger took a little bit more circuit work. The trigger was actually a spring-loaded lever hooked to a potentiometer. The gradual change in resistance was what triggered the changes in the car’s velocity, so Chris made a couple measurements to figure out what resistance thresholds made the car go forward, stop, and in reverse. Keeping the potentiometer fixed, it became just another static resistor. Then the resistance of the potentiometer could be varied in stepwise fashion by connecting (or switching on) additional resistors in parallel.
Since it was easier to simply add resistors in parallel and lower the total resistance, I set the potentiometer to the “forward” and on position, and then reduced the resistance from there.
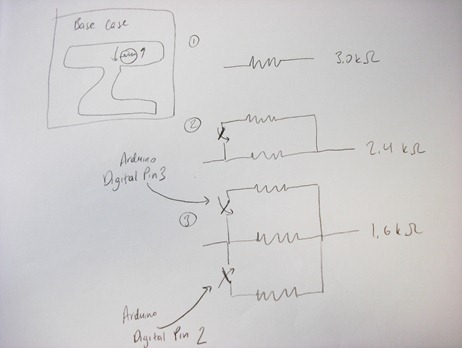 The switches were connected to and controlled by Arduino Digital Pins. From this sketch, there are three logic levels, represented by the different resistances: 3.0 kOhm, 2.4 kOhm, and 1.6 kOhm, which corresponds backward, stop, and forward.
With the logic switches in place, it was time to put the 3-axis accelerometer into the setup, and let gravity work its magic :)
Because the switches would be digitally controlled, I used a couple TIP120 transistors to do the job.
The idea is to use the outputs of the accelerometer to set off the switches once it hit a threshold value.
To set the right thresholds, I took measurements from the accelerometer over serial on the X and Y axes. First, I held it level, parallel to the floor. Then I tilted left and right, to get a read on the X axis, and toward and away from me to get a read on the Y axis. This way, I could set how much tilt it would take to steer or drive, and make the remote more or less sensitive. I’ve put the full code over on the App Store:
#define THROTTLE_FWD 160
#define THROTTLE_REV 350
#define STEER_LEFT 200
#define STEER_RIGHT 300
…
void loop() {
Serial.println(analogRead(1));
delay(5);
y_axis = analogRead(0);
x_axis = analogRead(1);
if (y_axis < THROTTLE_FWD) {
//forward
digitalWrite(2, HIGH);
digitalWrite(3, HIGH);
} else if (y_axis > THROTTLE_REV) {
//Reverse
digitalWrite(2, LOW);
digitalWrite(3, LOW);
} else {
//stop
digitalWrite(2, HIGH);
digitalWrite(3, LOW);
}
if (x_axis < STEER_LEFT) {
//LEFT
digitalWrite(11, LOW);
digitalWrite(12, HIGH);
} else if (x_axis > STEER_RIGHT) {
//Right
digitalWrite(11, HIGH);
digitalWrite(12, LOW);
} else {
//center
digitalWrite(11, HIGH);
digitalWrite(12, HIGH);
}
}
It’s pretty easy to get the accelerometer set up. I just wired in the Vin and Gnd, and then connected the Xout and Yout to different analog pins, which I polled in the code above. If the tilt values from the accelerometer were past threshold, the Arduino’s digital outs would go HIGH, switching the circuits on, and putting the RC car into motion.
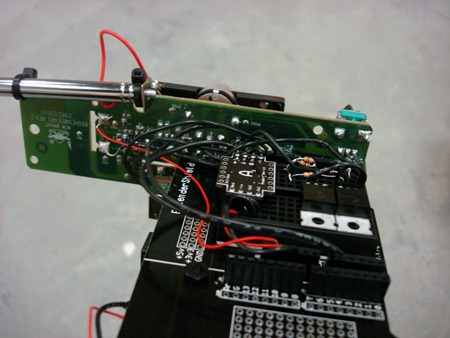
Here’s another shot of the completed rig…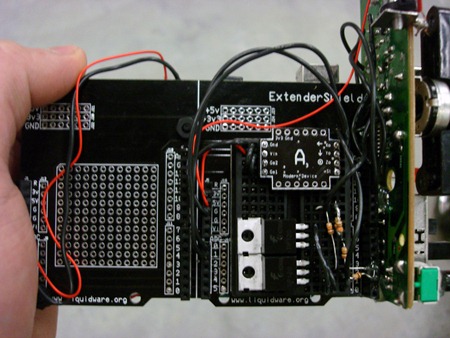 And here’s a behind the scenes video where I tested the car upside down, just to be sure everything was running smoothly:
The accelerometer is up over at Modern Device, the other parts are over at the Liquidware shop, and the RC Car is from Target.
No comments:
Post a Comment