Some of the comments from the Wired and Gizmodo articles were from folks asking what they could possibly do with open source hardware that they couldn't do with something finished, like an iPad.
I've never been one to compare myself to Apple, mostly because they make it hard to hack. But being able to hack the hardware means a lot of things. Most of the time I need the hardware to do something pretty specific that no handheld computer really comes with, like sensors.
It could really be any sensor, because as long as I had input/output pins I could tap into, I could modify the hardware to do all sorts of things. Since I had a bunch of sensors I had already been using with the Arduino, something simple I could do would be to take my sensor setup, and integrate into the BeagleBoard computer.
The part I really liked is that I could swap out whatever sensors I wanted, and still have it talk to my BeagleBoard computer. Of course, I also got a kick out of being able two use both of my favorite open source hardware platforms at the same time…
For this project, I used an Arduino Duemilanove, a 3-axis accelerometer, BeagleBoard C4 and a BeagleTouch. When connecting anything to the BeagleBoard via USB, a 4-port USB hub is useful too.
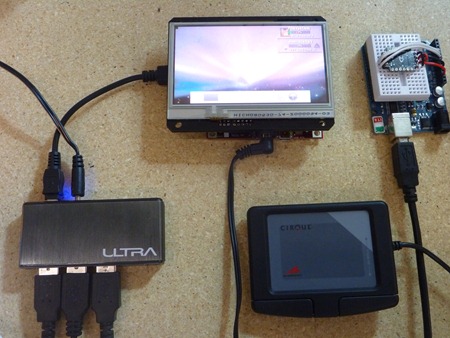
Setting up the Arduino + Sensors + BeagleBoard on the BeagleTouch was actually pretty straightforward. The Arduino and Sensors can start outputting data with just a few lines of code found on a PDF cheatsheet, in this case for the accelerometer. Then, I got a couple drivers onto the BeagleBoard, and plugged the Arduino into the BeagleBoard over USB, and voila :-)
When connecting the BeagleBoard to the Arduino for the first time, I needed to install some USB drivers.
Step 1 (on Desktop): Download USB Serial and FTDI Linux packages
Before the Arduino could talk to the BeagleBoard, as with many computers, the BeagleBoard needed to have the right FTDI and USB serial drivers. I’ve uploaded them to the Liquidware server here:
Step 2: Copy these files to an BeagleBoard boot SD card
To put these on the BeagleBoard, I copied the USB Serial and FTDI packages to my BeagleBoard boot SD card (root directory).
Step 3 (on BeagleBoard): Plug SD card into BeagleBoard and BeagleTouch, and power on
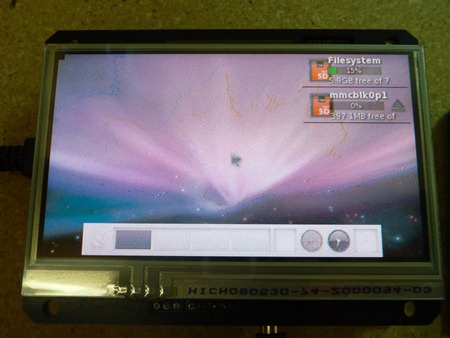
Once booted, the BeagleTouch will show two storage spaces in the upper right corner: the BeagleBoard flash memory, and the SD card.
Open up both, then drag and drop usbserial.ipk and ftdi.ipk to the BeagleBoard flash.
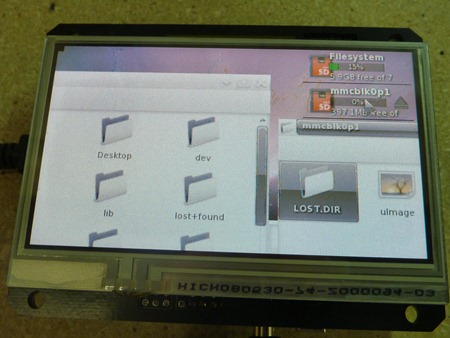
Step 4: Install packages on BeagleBoard
Open up Terminal on the BeagleBoard, and type the following commands:
cd Desktop
opkg install usbserial.ipk
opkg install ftdi.ipk
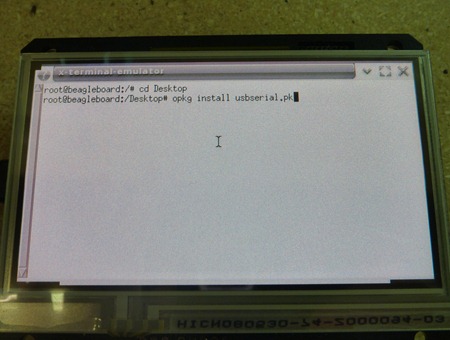
The BeagleBoard is now capable of talking to the Arduino.
NOTE: I only needed to do this the very first time I connect the Arduino to the BeagleBoard, and I can start at Step 5 the next time I do it.
Step 5: Attach a sensor to the Arduino
Before I plug in my Arduino and sensor to the BeagleBoard, I want to wire it up and pre-program it. I decided to use an accelerometer for this demo, because it’s really easy to see the response.
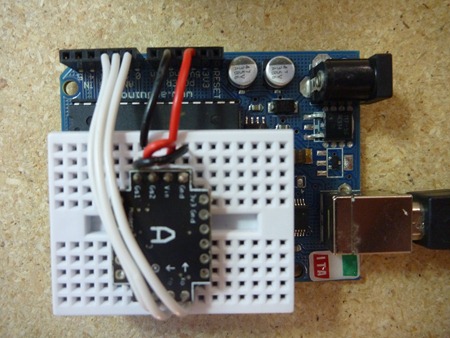
I wired up the accelerometer using the instructions in the accelerometer cheatsheet (PDF). A mini breadboard and some jumper wires comes in handy here.
Accelerometer pins –> Arduino pins
GND -> Ground
Vin -> 5V
Gs1 -> Ground
Gs2 -> 5V
X0 -> Analog 0
Y0 -> Analog 1
Z0 –> Analog 2
Step 6: Upload accelerometer code to the Arduino
First, I connected the Arduino + Accelerometer setup to the computer with a standard Type B USB cable.
Switching over to the Antipasto Arduino IDE (IDE install instructions here, if you don’t have it already), I copied and pasted the code into the IDE, then pushed upload.
void setup() {
Serial.begin(9600);
}
void loop() {
int valueX = analogRead(0);
Serial.print("X: ");
Serial.print(valueX);
Serial.println(" ");
int valueY = analogRead(1);
Serial.print("Y: ");
Serial.print(valueY);
Serial.println(" ");
int valueZ = analogRead(2);
Serial.print("Z: ");
Serial.print(valueZ);
Serial.println(" ");
Serial.println(" ");
delay(250);
} Now, the Arduino is ready to be connected to the BeagleBoard.
Step 7 (on BeagleBoard): Start reading sensor information on the BeagleBoard
To do this, I unplugged the Arduino + Accelerometer setup from my computer, and plugged it into the USB hub attached to my BeagleBoard.
Then I went back to Terminal on the BeagleBoard and typed:
cd
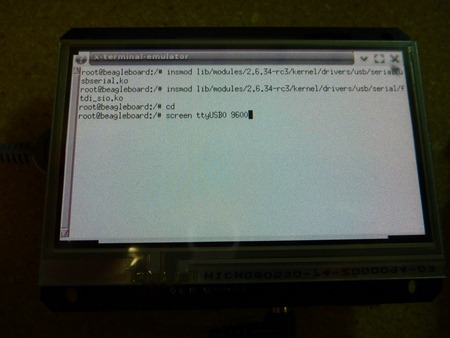
insmod lib/modules/2.6.34-rc3/kernel/drivers/usb/serial/usbserial.ko insmod lib/modules/2.6.34-rc3/kernel/drivers/usb/serial/ftdi_sio.ko
This loads the USB drivers that I installed earlier. To start reading data from the Arduino over serial, I typed the following in Terminal:
cd
screen dev/ttyUSB0 9600
And that’s it! The accelerometer is now writing data directly to my BeagleBoard and BeagleTouch.

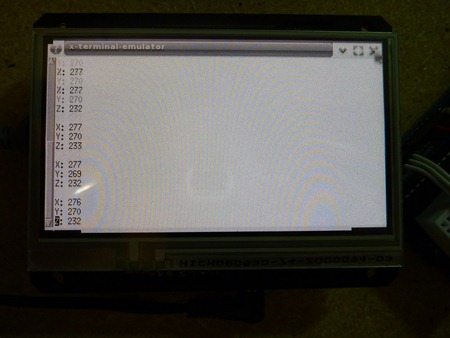 Here’s a video of everything in action:
This can also work with a light sensor, compass module, or humidity sensor…or just about any sensor I can run off my Arduino. I wonder if I can do that with my iPad :-)
7 comments:
Dude, this is freakin' AWESOME! I've been thinking about how one would accomplish this for the last couple of weeks but I didn't know how to make the BeagleBoard talk to the Arduino. Thanks so much for this. If you're taking requests, I'd love to see a demo going the other way, i.e. programming the BeagleBoard to control output on the Arduino like LEDs or servos or something along those lines. If not, no biggie, this puts me months ahead of where I'd have gotten on my own.
Thanks!
Scott
This reminds me of the Nokia PUSH N900 contest. Most projects had some kind of thing based on Arduino talking to the N900 using bluetooth.
It would be really great if it were easier to make this kind of stuff. Either control IO pins from the phone/beagleboard itself, or have an (even) easier way to connect with an external micro-controller.
Parallel port was a paradise. RS-232 was manageable. The switch to USB was a geek holocaust. We need more little USB <-> GPIO devices everywhere. And phones with USB OTG working for real. Urgent.
If we could use C# or C++ and visual studio for the beagle board it would be as easy as the Arduino to make program for. Look at http://www.netmf.com/
There is a porting kit for it as now they have a new open license (appache 2 i think.) but i cant figure out how to make my code exec on it...
@scott - thanks :-)
@NIC - I know, I'm workin' on it... I agree, it's a bit round-about, but it works pretty well...
@madrang - thanks, i'll check it out tonight...
Awsome, i am also reading all i can on netmf on my side to try to port it to the beagle board, but i am a .net programmer and don't really know how to use gcc and this stuff... i got use to the arduino but now fell its limitation and would like to switch to the beagle board, not as a computer but more a platform for robotic, something that netmf would let me do. i also found an other info page about it : http://www.microsoft.com/netmf/default.mspx
ps : if you got something interesting send me a mail to the same user on gmail.com
Post a Comment